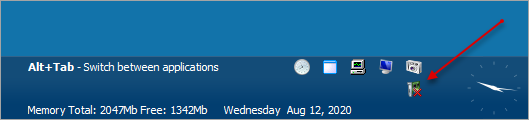
At the bottom right corner of the taskbar, a system tray is placed with a clock showing the system time and date. In the middle of the
screen you can watch the system memory (RAM) usage information and its availability.
As well, several icons provide quick access to system utilities. To see a "hover box" with additional information about a system utility
icon, hold the mouse pointer over one of the icons.
Use these icons to conveniently open these utilities:
Date, Time & Zone (You may also double-click the
clock at bottom right corner)
If a network is installed, the Network connection icon displays full configuration details such as operational status, IP address,
DNS server address, firewall status, and so on.
If a second language is installed, the current language is displayed, along with a hint about how to change the active language.
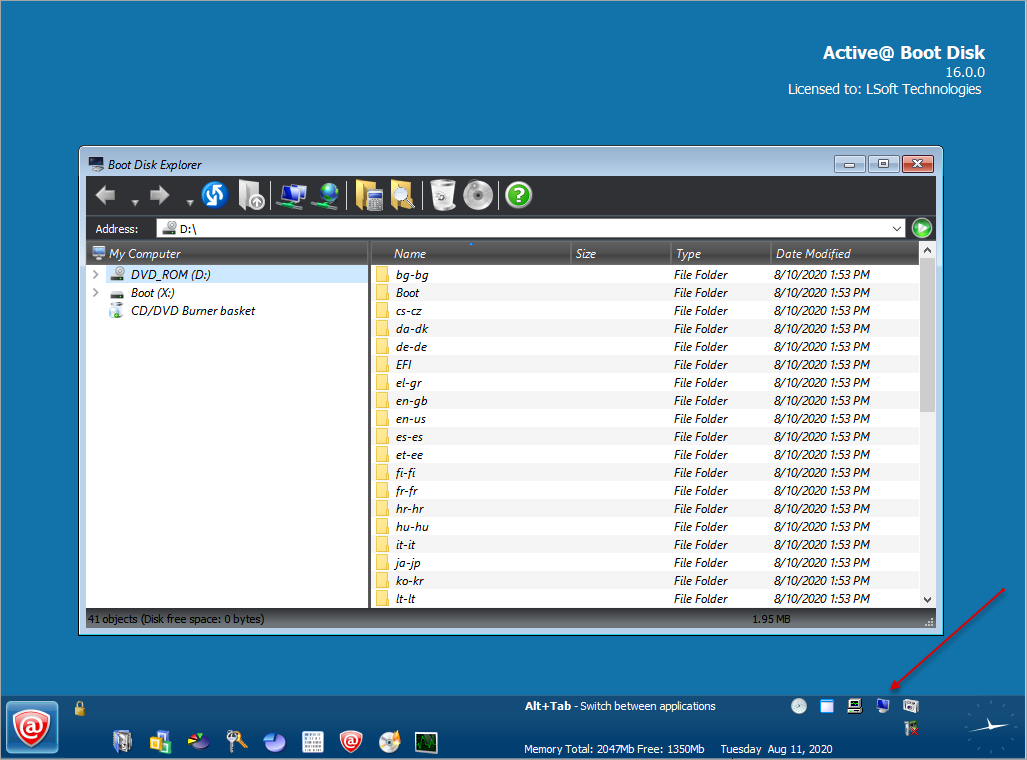
After you have successfully started Active@ Boot Disk, click Utilities > Explore My Computer. The Boot Disk Explorer
will appear. You should see all the physical and logical devices associated with your computer along with the RAM drive Boot (X:).
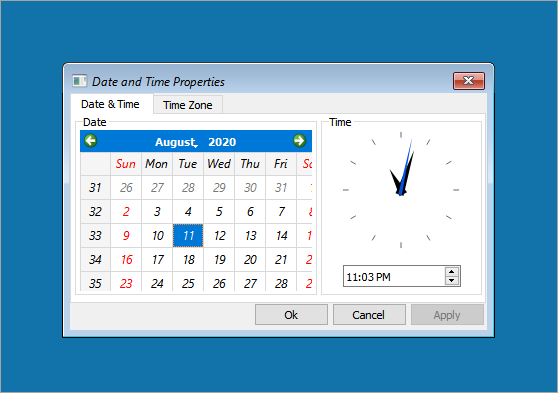
Date, Time & Zone
The straight forward utility to change/adjust your computer's date, time and time zone
When you set display configuration options for date and time in the operating system, these settings affect the Date dialog box
and other operating system windows. The Date & Time changer also adopts the settings as you enter dates and times.
To open the Date & Time changer, click Start > System > Date, Time& Zone or double-click the clock at bottom right corner.
Note: If you create records that are date and time dependent, they are stored in the current time zone. If you change the time zone
setting, records in the database are not changed to reflect the new time zone setting.
To set the date and time:
Click the Date & Time tab.
Use the calendar to pick the current date.
In the digital time box click the hour, minute or second.
Use the spinner control to change the digit forward or backward.
Click Apply.
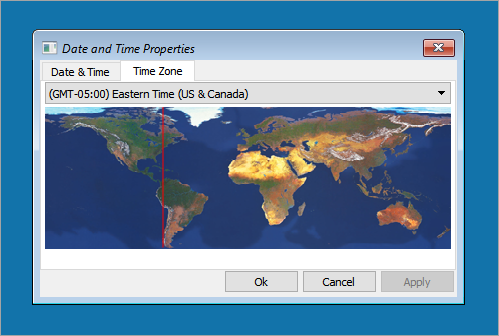
To set the time zone:
Click the Time Zone tab.
From the drop-down list, set your time zone, relative to GMT (Greenwich Mean Time).
Click Apply.
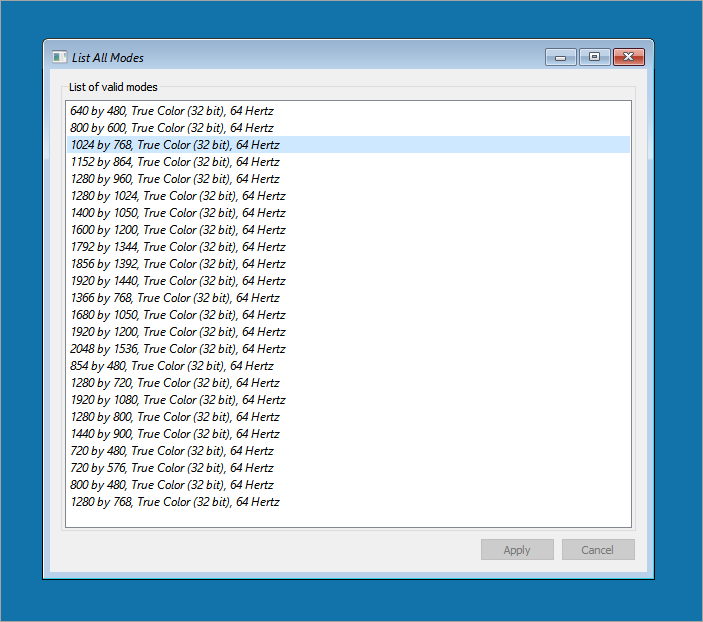
Display Settings
Convenient tool to change screen resolution and number of colors on fly.
To use Display Settings configurator:
In the Active@ Boot Disk shell, click Start > System > Check Local Disks. The List All Modes list appears with a list of all valid modes.
Click a mode to select. The Apply button is enabled.
Click Apply.
The display mode is changed.
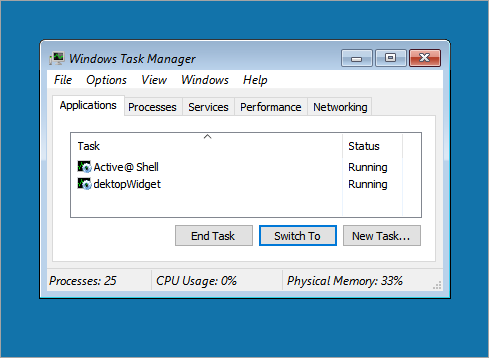
Task Manager
The main tool to track/troubleshoot working applications, running processes and services, monitor system and network load
(performance)
To open Task Manager click Start > System > Task Manager. You may also use the familiar key combination Ctrl+Alt+Del to open Task
Manager.
The Applications tab displays the status of the programs that are running on the computer.
The Processes tab displays information about the processes that are running on the computer. A process can be an application
that you start or subsystems and services that are managed by the operating system.
Similarly, the Services tab displays information about the services that are running on the computer.
Click the Performance tab to view a dynamic overview of the performance of your computer. You can
monitor, for example, memory available for the current tasks.
Boot Disk Explorer
Boot Disk Explorer is a fast, small, compact and innovative file manager, similar to Windows Explorer.
Boot Disk Explorer has some additional features that can't be found in Windows Explorer:
Displays the total size of each folder
Allows you to browse folders from a tree-view or list-view interface
You can map an FTP server as a drive letter, the same way that you would map a network drive using buttons on the
toolbar
When you copy a file, the progress bar will provide you with the information about the ongoing process
Using ZDelete toolbar button, you can permanently destroy selected files and
folders permanently
Using Burn Disk toolbar button, you can burn data files and folders from CD/DVD Burner basket
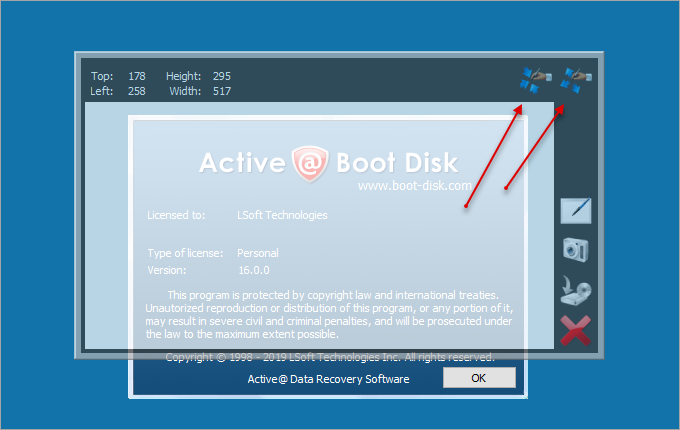
Screenshot Utility
This utility is an easy-to-use, flexible way to take a snapshot of on-screen details in the Active@ Boot Disk environment.
To use Screenshot Utility:
Open any Active@ Boot Disk application.
Click the Screenshot icon. The Screenshot workspace will appear as a semi-transparent overlay.
Change the size and location of the workspace. The area that is covered is the area that will be captured
When you change the size and the location of the workspace, the Top and Left values change to
identify the location of the top left corner of the workspace. At the same time, the Height and
Width values change to reflect any change in the size of the workspace
To change the size of the Screenshot workspace, click and drag an edge or a corner of the workspace
To change the location of the workspace, click anywhere on Screenshot and drag to a different location
To fill the entire screen, click Maximize
To return to the initial capture size, click Default size
With the Screenshot workspace in place, you can return to the original application using
Alt+Tab keyboard combination
You can also click the original application to return to it, however if you click an area of the application that
is covered by the Screenshot workspace, the focus will return to Screenshot
To capture the screen image, in Screenshot, click Grab and a semi-transparent image of the screen
will appear on the desktop
To clear the existing screen image, click Clear
To save the screen image, click Save and navigate to the folder where you want to save the image. You can
save the image as PNG or BMP
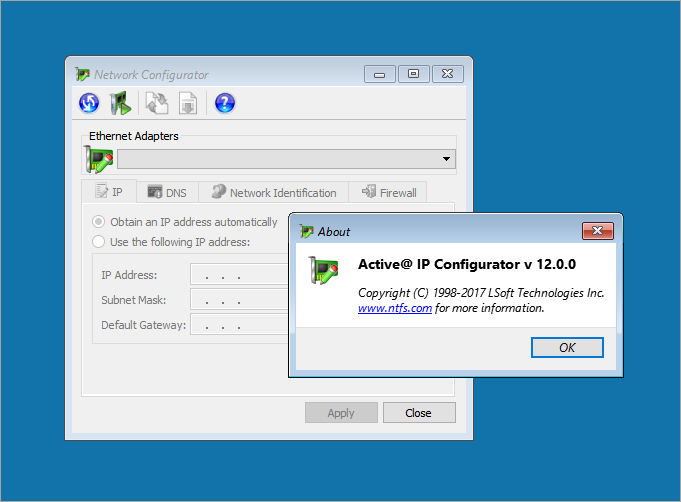
Network Configurator
This utility works only on computers with adapters that are configured to obtain an IP address automatically. It renews
DHCP configuration for all adapters.
To configure the IP address:
From the Active@ Boot Disk shell, click
Start > Network > Network Configurator. Or click the Network Configurator icon at the bottom right corner of the taskbar:
The Network Configurator dialog box appears.
If network service has not been started at boot up time, start it by clicking toolbar button Initialize
Network
Select an adapter from the Ethernet Adapters drop-down list
To view details about the selected adapter, hover the mouse over the Ethernet Adapters field. A drop-down text screen will
appear.
In the IP tab, do the following:
To get an IP address automatically from the network server, select the Obtain an IP address automatically
radio button.
To use a specific IP address, select the Use the following IP address radio button and type the information
in the fields below.
In the DNS tab, do the following:
To get a DNS automatically from the network server, select the Obtain DNS Server address automatically
radio button.
To use a specific DNS address, select the Use the following DNS Server address radio button and type the
information in the fields below.
In the Network Identification tab, to specify a workgroup for group access, type the workgroup name in the
Workgroup field and click Set.
In the Firewall tab, you can set the status of the firewall in the Firewall status drop-down list: