Search & Edit Local Registry Utility
This utility searches for registry hives in the local drives and attaches them to the Registry Editor for viewing or editing.
This section describes the steps required to recover from the Windows registry hive corruption in a case where the file table is still intact.
To recognize the situations when you have a Windows registry hive corruption while trying to start Windows, you might get a message similar to this:
Windows could not start because the following file is missing or corrupt: \WINDOWS\SYSTEM32\CONFIG\SYSTEM
or
\WINDOWS\SYSTEM32\CONFIG\SOFTWARE
When you boot with Active@ Boot Disk, Windows PE mounts the unfunctional drive and assign it a different drive letter in order to have an exclusive access to it.
To repair the broken registry hive do the following:
- From the Active@ Boot Disk shell click .
- The Attach and edit local Registry dialog box appears:
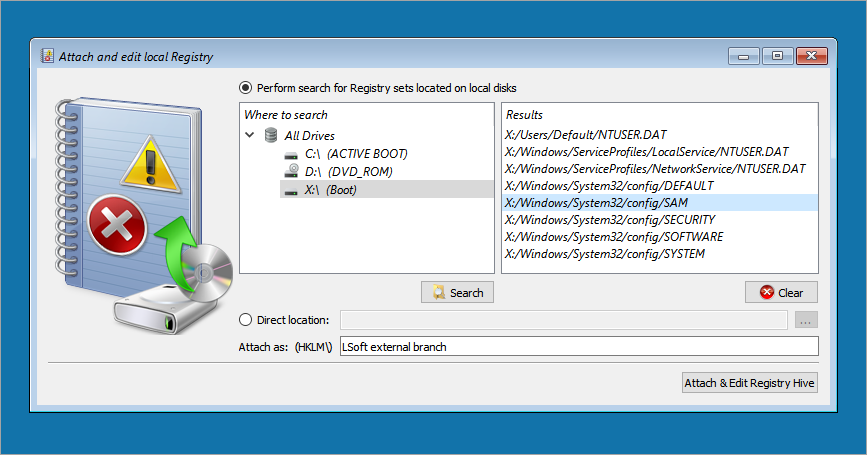
- To search local drives, do the following:
- Click the Perform search for Registry sets located on local disks radio button.
- Choose the local drive folder that was mentioned in the error message.
- Click Search. Drive and folder names will appear below the search button as they are being searched.
- Results of the search appear in the Results list.
- Select the broken hive in the Results list. The Attach as box is enabled.
- To browse directly to the broken hive, do the following:
- Click the Direct location radio button. Controls in the lower area are enabled.
- Click the ellipsis button (…) and browse to the broken hive.
- In the Attach as box type a custom hive name. This is a temporary name, so the actual name does not matter.
- Click Attach & Edit Registry Hive. The Registry Editor appears
with the custom hive selected:
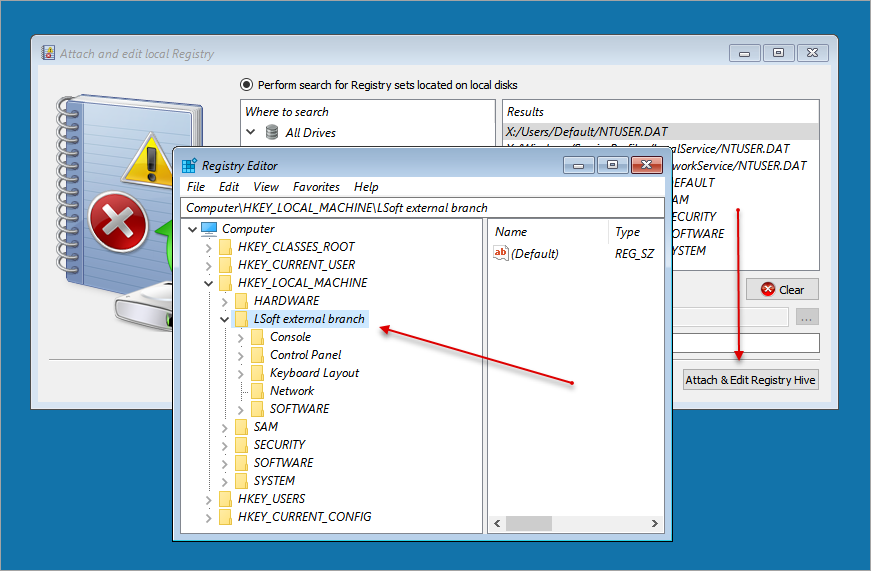
If you are repairing a broken hive Registry Editor will display a message that says “One or more files containing the registry were corrupt and had to be recovered by use of log files. The recovery was successful.”
- In Registry Editor select the temporary hive that you just created. From the File menu, choose Unload Hive.
- Dialogue box asking for your confirmation will appear. Click Yes. The temporary hive is unloaded.