Active@ File Recovery is a data recovery utility that you can use to restore accidentally deleted files and folders located on the
existing drives, and even on deleted or damaged partitions.
It is best to save recovered data on another physical, logical, removable or network drive. Make sure that you have access to another physical
or logical drive before attempting to recover a file.
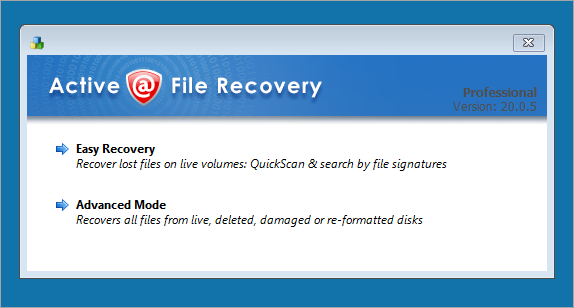
To run Active@ File Recovery:
From the Active@ Boot Disk shell, click Start > Programs > Active@ File Recovery.
After choosing an Advanced Mode the Active@ File Recovery workspace
will show up with all available devices listed in a tree view under Local System Devices.
To scan a logical drive, select it. A message in the right pane reads Disk not scanned yet...
To scan the drive in basic mode, do the following:
Click Quick Scan. The status bar will be displaying the progress of the scan.
After the scan is completed, files and folders will be listed in the right pane.
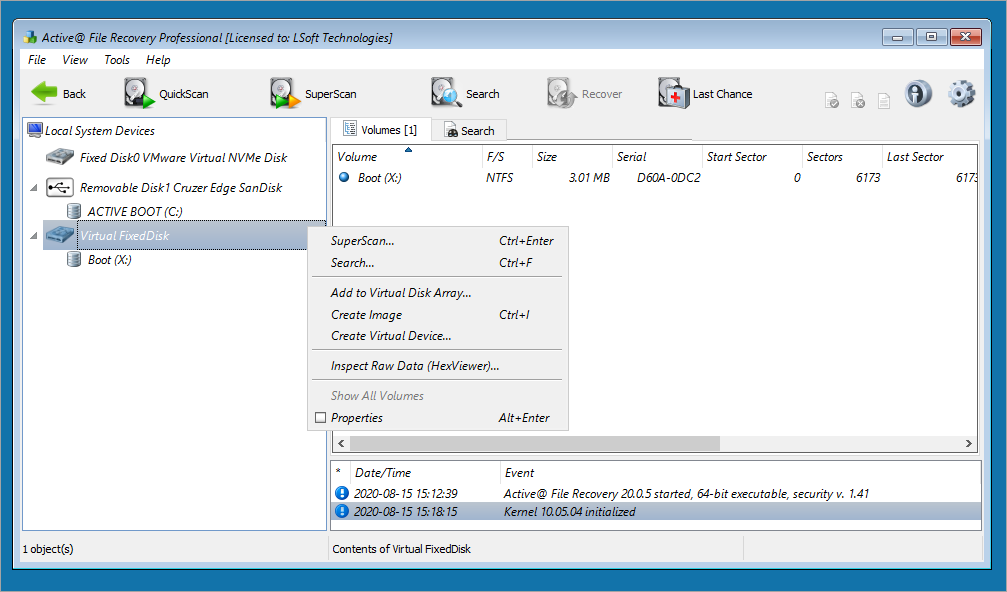
Recovering via SuperScan - if you cannot locate or find your deleted files and folders, to process the whole surface of a disk,
right click on it and click SuperScan.
When the SuperScan Options dialog box shows up, do the following:
In General tab you can restrict the scan to a small number of sectors indicate the From sector and the number of
sectors to scan. Limiting the scan on a small area can greatly reduce the time required for scan to finish. Again if you are not
sure about this option just leave it as is.
You can further limit the search by focusing it on the file systems that exist on your deleted or damaged partitions
In Signatures Recognition tab you can further specify which file types would you want Active@ File Recovery to
search for. Thanks to in-built tools File Recovery can rebuild file types (DOC, JPG, DOC, ZIP, etc) from partial data that you
really need, ignoring the irrelevant data and saving processing time.
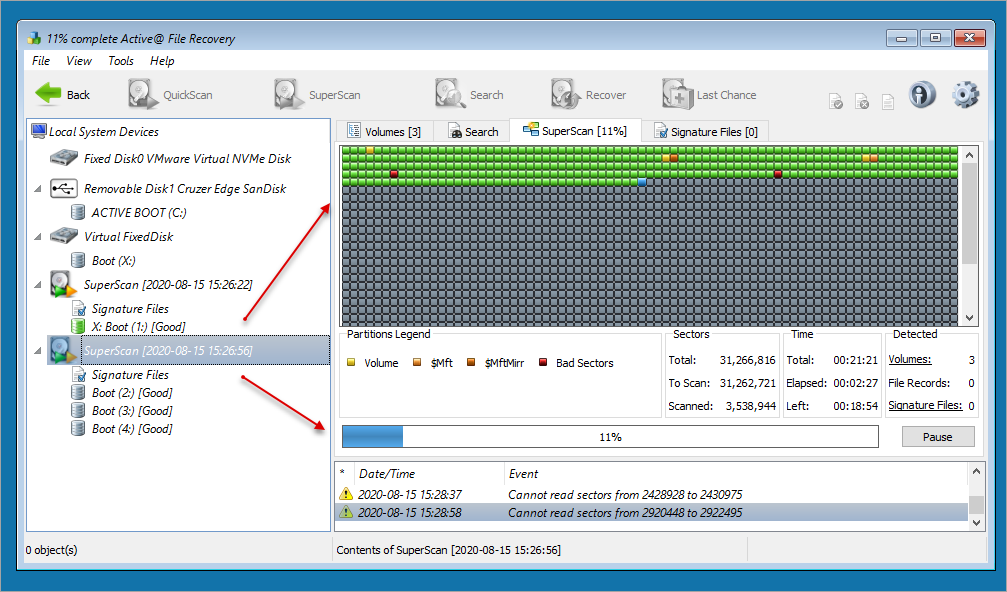
Click Scan. The status bar displays the progress of the scan:
After the scan is complete, a list of detected partitions appears in the right pane. You may search through these partitions.
If you chose to re-build image files, a folder named Files Recognized by Signatures will be created. After the recovery you can
search through the contents of this folder.
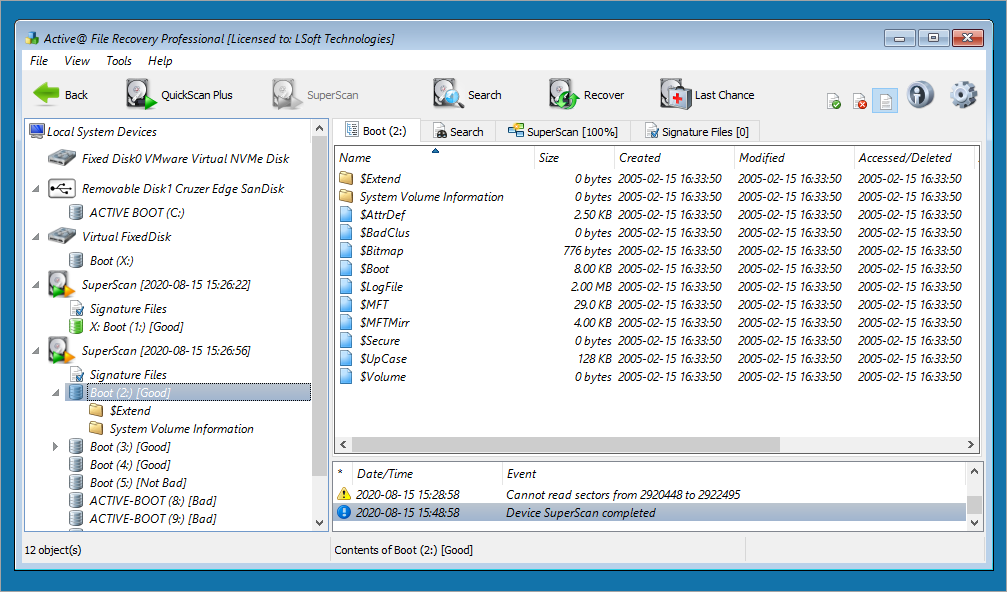
After you have scanned a drive all you need to do now is to search for deleted or damaged folders or files:
To search manually, click on the SuperScan result. This will show the scanned files in the right pane:
Click on the file type you are interested in and you can organize them by size and various other attributes such as camera model,
date created, width, height, etc.
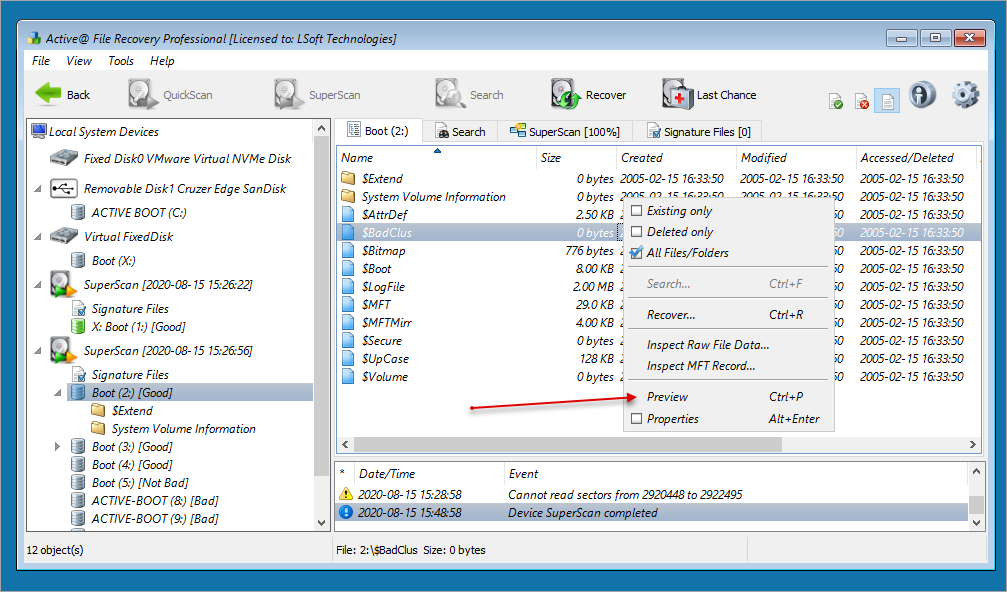
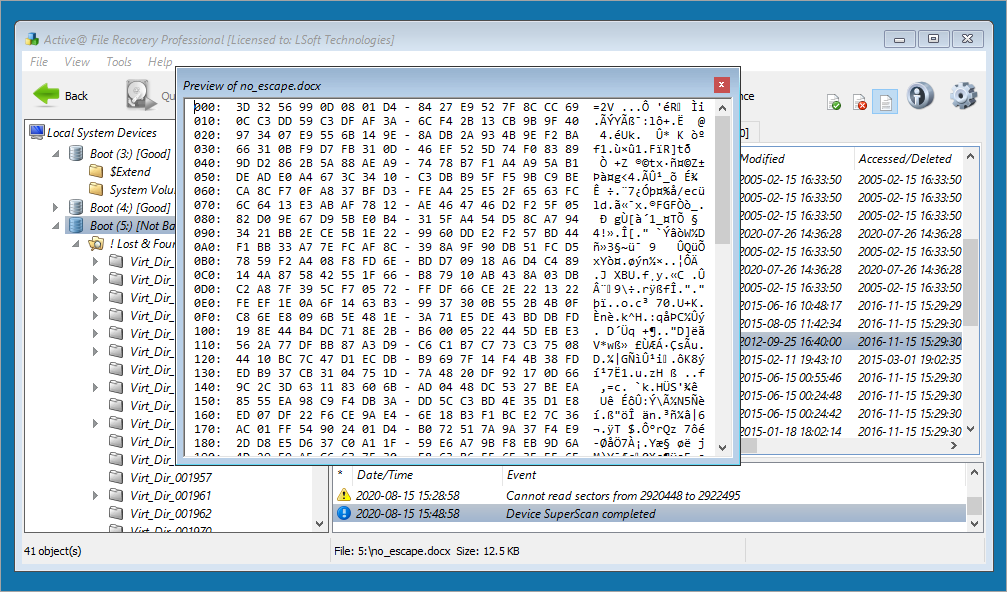
You can also preview the scanned files by right clicking on one of them and choosing the Preview option:
Active@ File Recovery also supports Windows shortcuts. Meaning that you can select and recover
multiple individual files by clicking on them and holding Shift or Ctrl.
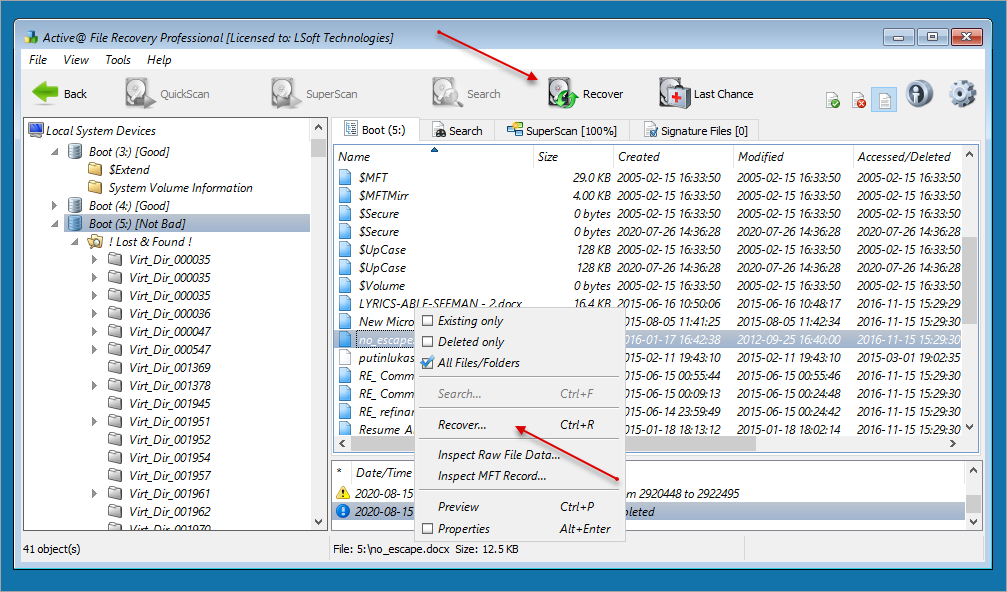
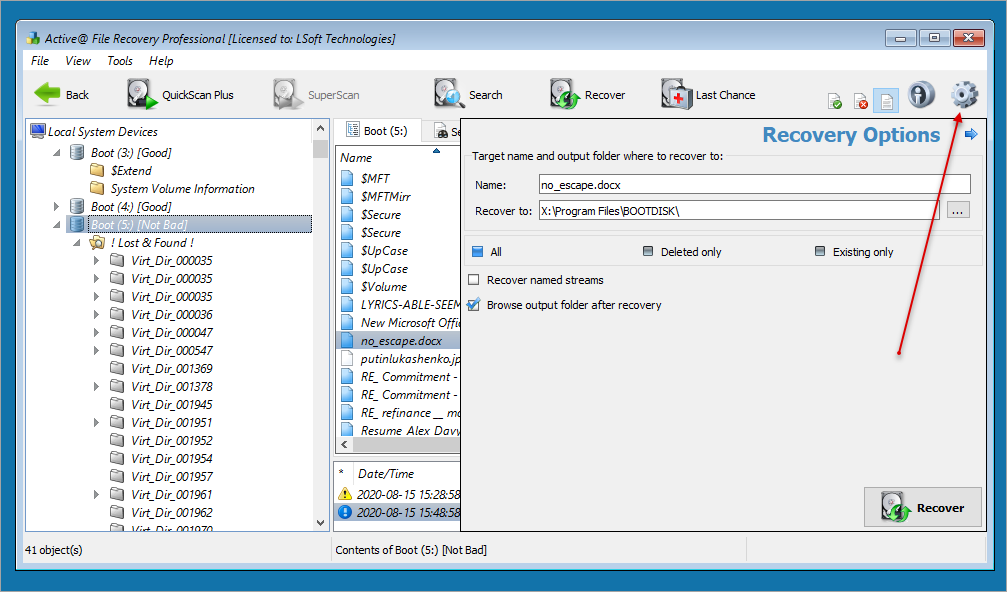
Once you have found and selected the files you want to recover right click for the context menu and choose Recover
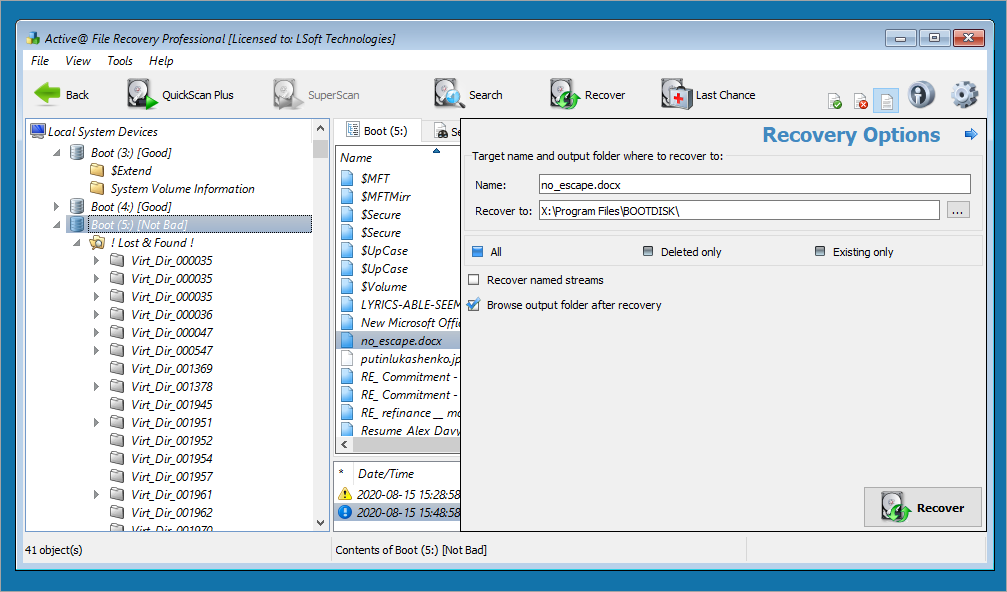
Recovery Options window will pop up asking you to choose and confirm the Recovery
location for your files:
You can also limit the recovery on only those files that have been deleted.
If you are recovering files that have been damaged make sure to check Existing only check box
Of course, if you are trying to recover some of the files that have been deleted as well as some of them that have been damaged
make sure to mark All check box
Do not recover your deleted files on the same hard drive where you have previously deleted them
For further customization click on Settings in the upper left corner: This will open the Settings window:
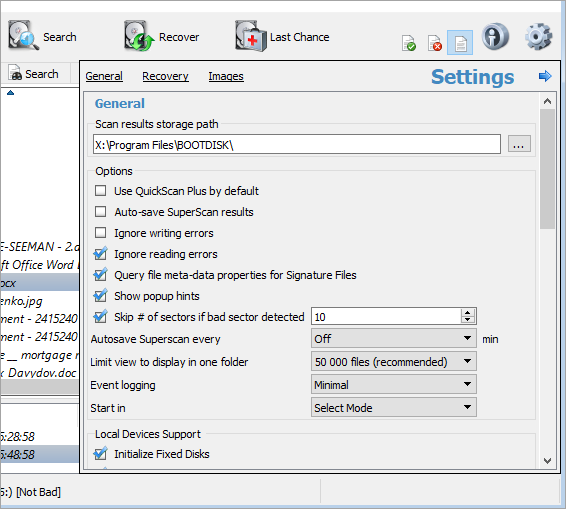
In the General window you can choose the storage location for your Scan results, as well as some other options concerning
scanning and your local devices
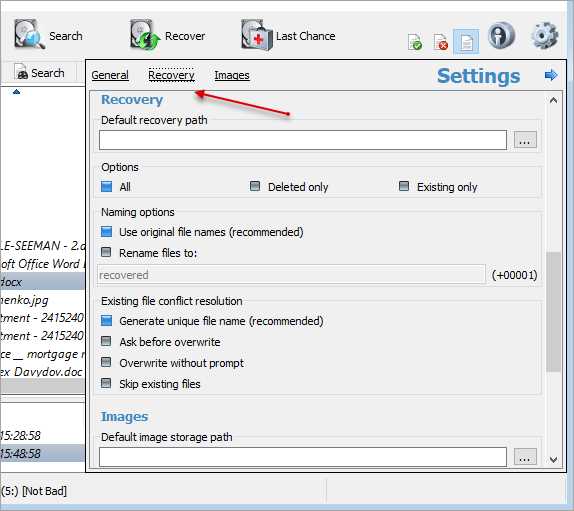
Recovery tab basically has the features from the initial Recovery Options
window.
Additionally you can automatically rename your recovered files be giving them a basic name and adding a number for
each one later on. The default name is "recovered".
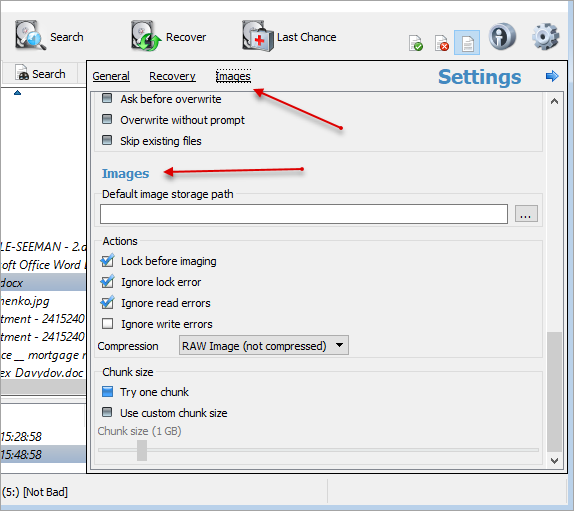
Images tab is reserved for image creation and storing.
Here you can designate image storage path, compression,
chunk size etc.
When you are finished with changes in this window click Apply before exiting and you will be back to the initial Recovery
Options Window
In the Recovery Options window click on Recovery button which will initiate the recover the deleted files at the
location that requested.
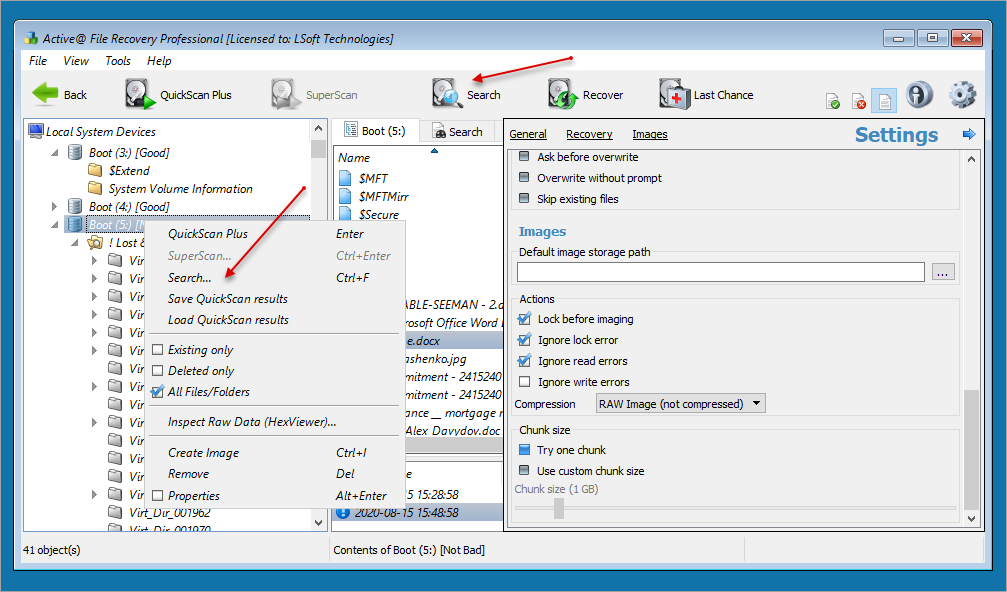
Alternatively you can also use Advanced Search tool by right clicking on the drive that contains your deleted
files, or just by selecting it and choosing Search in the top on context menus
New Search window will appear offering you various customization settings:
In the Find What field enter all or part of a file or folder name. You can use wildcard characters to locate all files or
folders that include that part in a name.
In the File Type drop-down list select the type of file or folder to search for.
In the next three check boxes you can choose to include:
Deleted - select this check box to search through files and folders marked as deleted. If you know that the
file or folder you are searching for has not been deleted, that is - if the file or folder is damaged and still exists in the file
table - clear this check box.
Non-deleted files and folders - select this check box to search through existing files and folders. If you know
that you are searching for a deleted file or folder, clear this check box.
All files and folders - combines two previous search methods, enabling you to look for files and folders in
different states.
Case insensitive search - File Recovery will search for the Find What file or folder name disregarding upper or
lower case letters by default. In order to search for a file or folder by using the combination of upper and lower case letters in
Find What field, select this check box.
To search for files or folders based on a specified date range select any combination of check boxes for Created, Modified or
Accessed (Deleted) and indicate the date range.
To search for files or folders based on the size of the file, select the Size check box and indicate the size range.
To start the search, click Find. The status bar will display the search in progress.
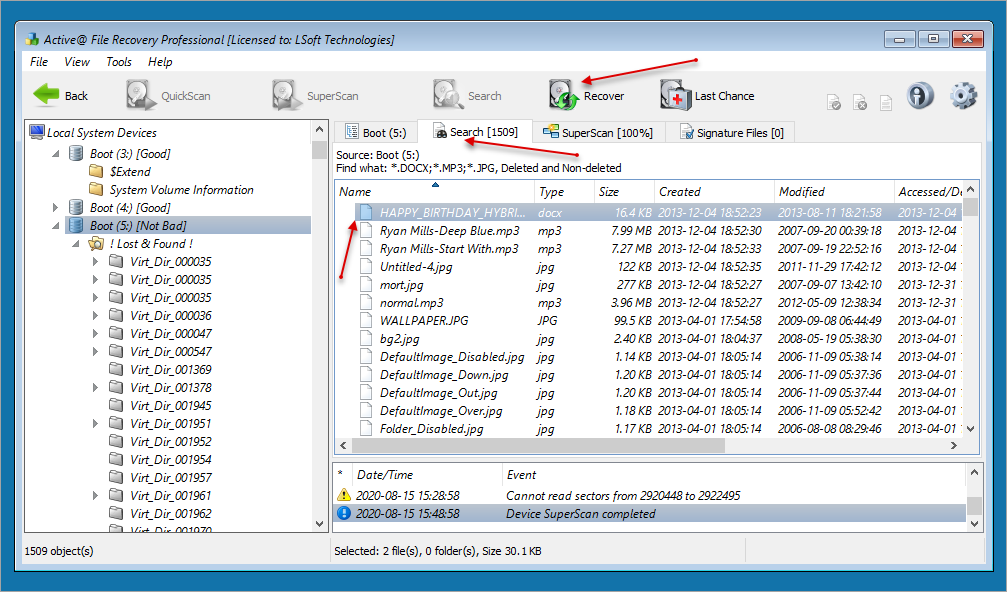
After the search has been completed, a new tab named Search will appear in the right pane.
Select a file or folder that you want to restore:
Click Recover. The Recovery Options dialog box will open.
Do the following:
In the Name field revise the file name.
In the Recover To field enter a path to a drive other than the drive where you found this file or folder. You can also
browse to another drive.
Click Recover.
The file or folder is recovered to the new location.
Note: A device scan or a search may take a long time. To stop a device scan or a search click Stop at any time.
Note: For more detailed instructions and support, see the Active@ File Recovery User Guide at Start > Documentation.