Active@ File Recovery
Active@ File Recovery is a data recovery utility that you can use to restore accidentally deleted files and folders located on the existing drives, and even on deleted or damaged partitions.
It is best to save recovered data on another physical, logical, removable or network drive. Make sure that you have access to another physical or logical drive before attempting to recover a file.
To run Active@ File Recovery:
- Select a required drive in the Local System Devices list on the main View
- From the Active@ Boot Disk shell click . After initializing, the Active@ File Recovery workspace appears:
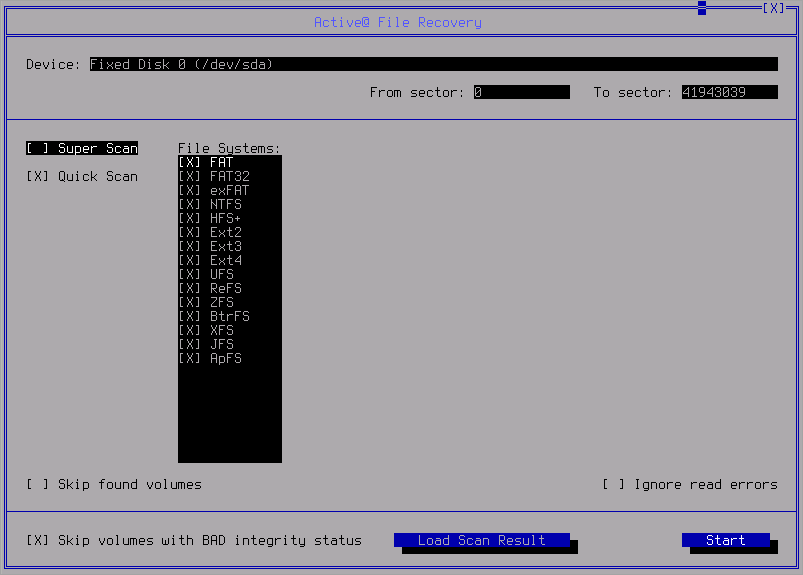
- To scan the drive in basic mode, do the following:
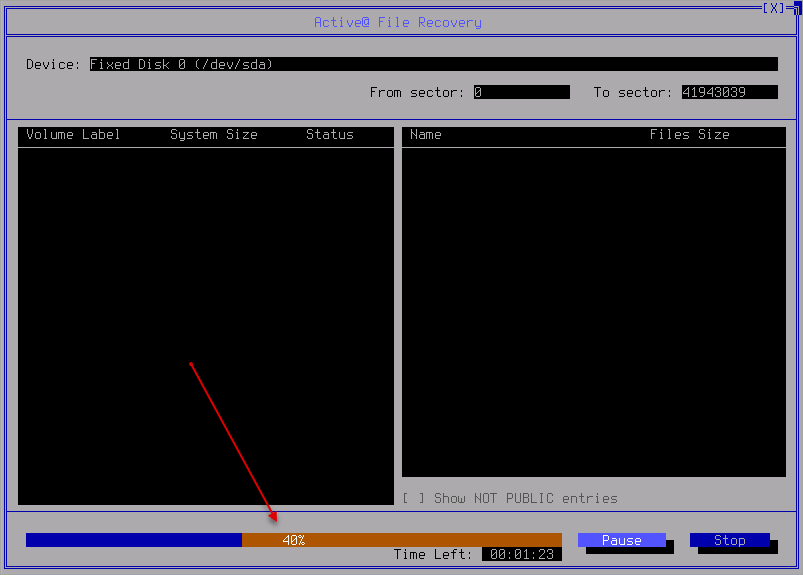
- Select Quick Scan and press Start. The status bar will be displaying the progress of the
scan:
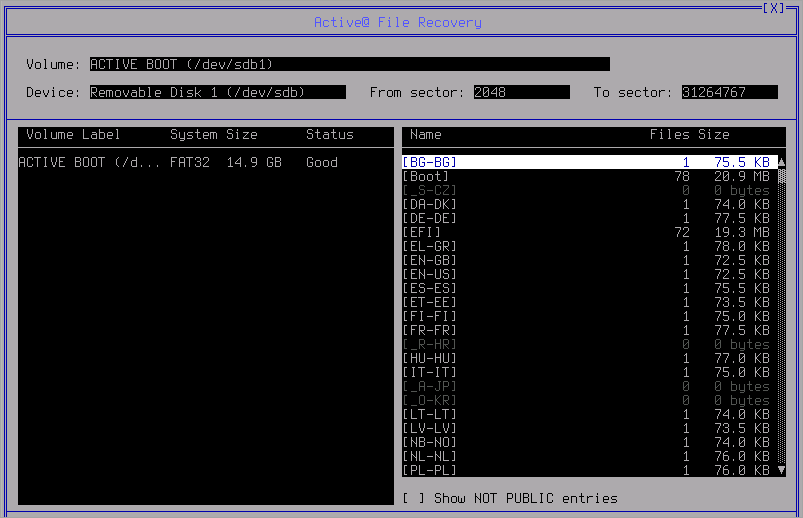
- After the scan is completed, files and folders will be listed in the right pane.
- Recovering via SuperScan - if you cannot locate or find your deleted files and folders, to process the whole surface of a disk,
right click on it and select SuperScan.
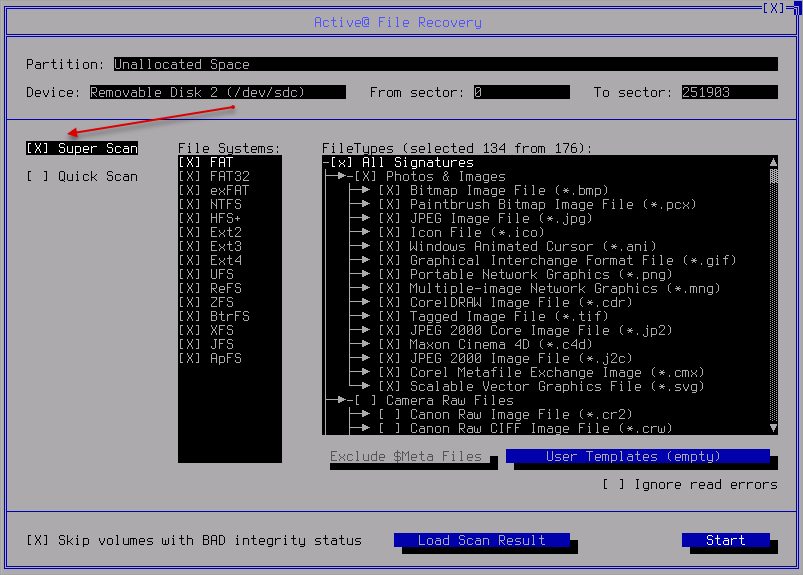
- When the SuperScan Options show up, do the following:
- You can restrict the scan to a small number of sectors indicate the From sector and the number of sectors to scan. Limiting the scan on a small area can greatly reduce the time required for scan to finish. Again if you are not sure about this option just leave it as is.
- You can further limit the search by focusing it on the file systems that exist on your deleted or damaged partitions
- In FileTypes tab you can further specify which file types would you want Active@ File Recovery to search for. Thanks to in-built tools File Recovery can rebuild file types (DOC, JPG, DOC, ZIP, etc) from partial data that you really need, ignoring the irrelevant data and saving processing time.
- Click Start. The status bar displays the progress of the scan.
- After the scan is completed, a list of detected partitions appears in the right pane. You may search through these partitions.
- If you chose to re-build image files, a folder named Files Recognized by Signatures will be created. After the recovery you can search through the contents of this folder.
- After you have scanned a drive all you need to do now is to search for deleted or damaged folders or files (will show the scanned
files in the right pane):
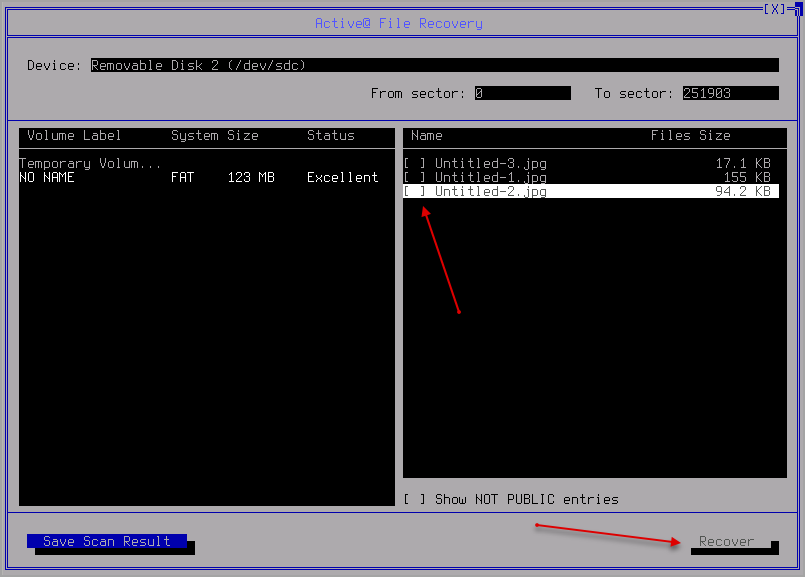
- Click Save Scan Result for saving the results.
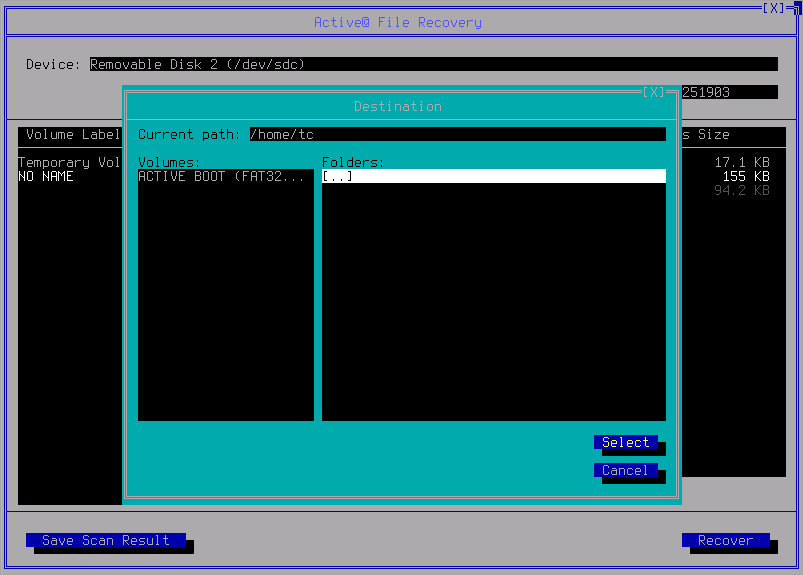
- Once you have found and selected the files you want to recover, click the Recover button.
- Destination window will pop up asking you to choose and confirm the Recovery location
for your files:
- You can also limit the recovery (by selection) on only those files that have been deleted.
Important: Do not recover your deleted files on the same hard drive where you have previously deleted them
The file or folder is recovered to the new location.
Note: A device scan or a search may take a long time. To stop a device scan or a search click Stop at any time.