Using Boot Disk Creator
Active@ Boot Disk Creator includes the latest driver packages, being able to recognize and work properly with nearly all the latest computer hardware configurations.
In order to create a bootable media or ISO image:
-
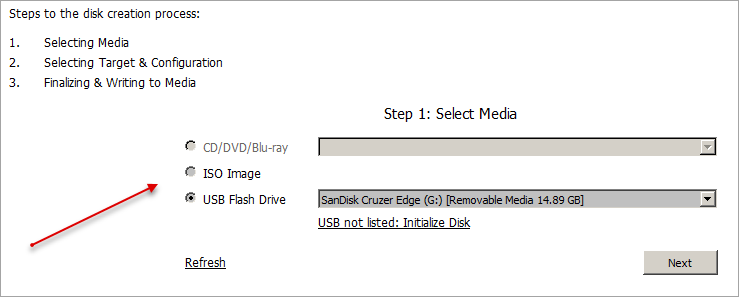
On the Active@ Boot Disk Creator main page select the desired bootable media: CD/DVD/Blu-ray, USB Flash Drive
or pre-configured ISO image file (can be used with virtual machines (VMs) like VMWare Workstation or Hyper-V,
or can be burned to CD/DVD/BD later on):
-
If more than one CD/DVD/Blu-ray burners are presented in the system or several USB drives are inserted, select a proper device
from dropdown lists. If some USB drive is not displayed in a list, click the link below and initialize it properly:
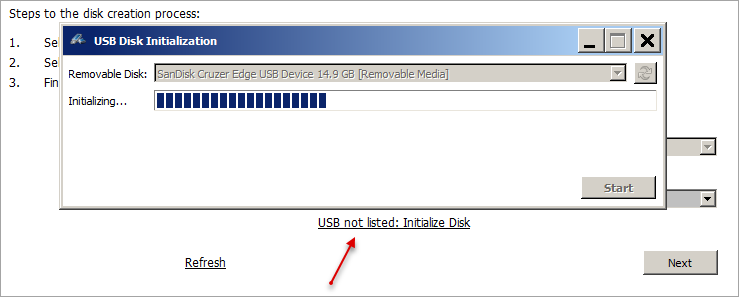 Important: Only 32 GB or less size partitions are supported (for best compatibility with all types of BIOS and UEFI Secure Boot systems). So if you have 64 GB USB, initialize it with 32 GB partition.Note: If you have purchased commercial version of Active@ Boot Disk, click Registration link to register software on your name or on the name of your business. Registration eliminates DEMO version limitations and activates all features of commercial software.
 -
By clicking Next you are getting to the target profile selection part:
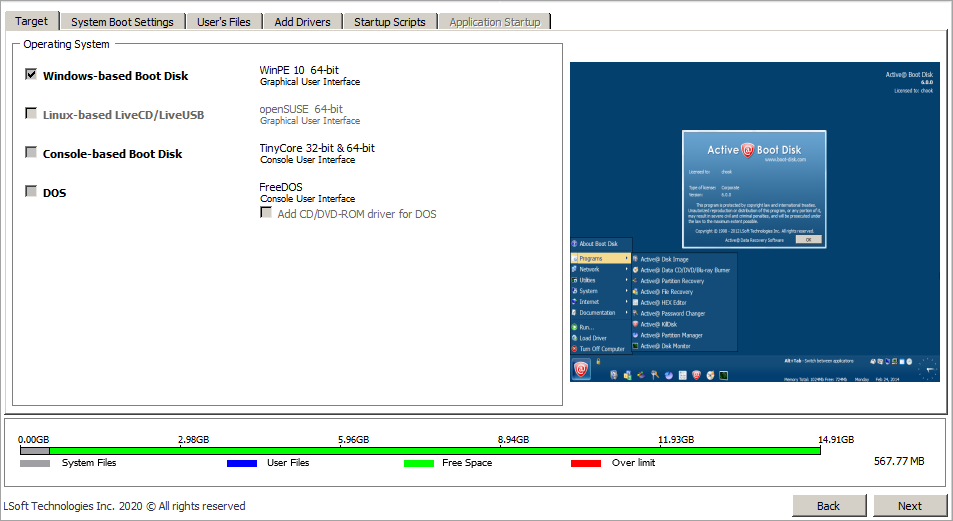
- Windows-based Boot Disk
- Windows PE 10 OS, 64-bit profile with graphical interface for user convenience
- Linux-based LiveCD/LiveUSB
- openSUSE Linux-based OS, 64-bit profile with graphical interface for user convenience
- Console-based Boot Disk
- Tiny Core Linux-based OS, 32/64-bit profile with console user interface
- DOS
- FreeDOS DOS-based OS, 16/32-bit profile with console user interface
- Memory tester boot (for ISO images)
- A convenient boot profile for memory testing
-
Choose the desired profile and specify additional options (if applicable)
- To specify additional boot options click System Boot Settings tab. You can change default settings
to be used: Time Zone, Additional Language and Keyboard support,
Display Resolution, Default Application => Start and Time to
Autostart => Seconds:
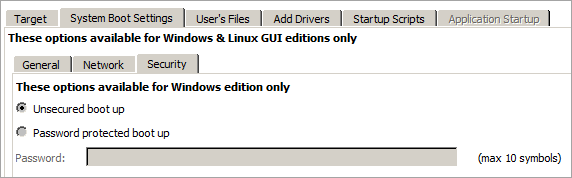
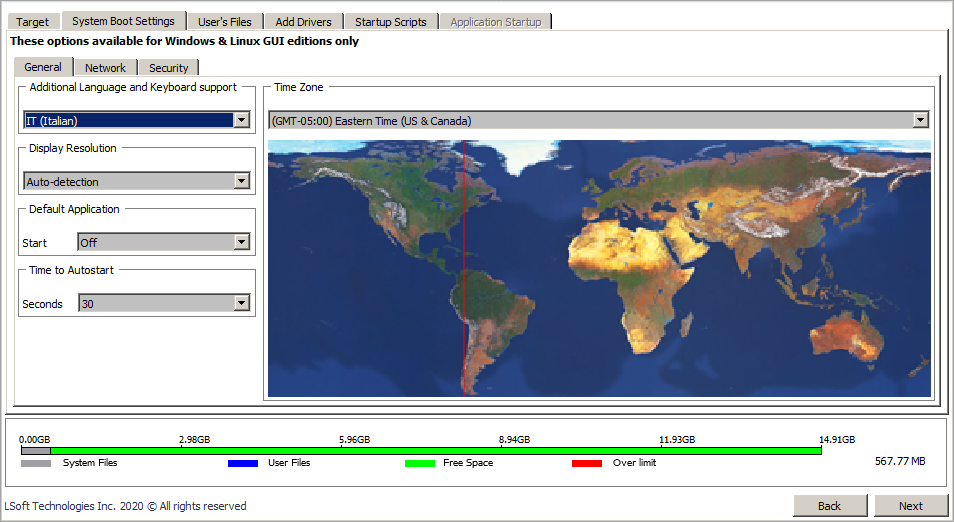 Note: Most of these options you can change later after booting from created Active@ Boot Disk drive at the starting screen.Two additional second level tabs: Network and Security allow you to pre-define Network Settings: network initialization, dynamic or static IP configuration and firewall state, as well as to set up your new boot drive password protection for boot up process to avoid unauthorized usage.
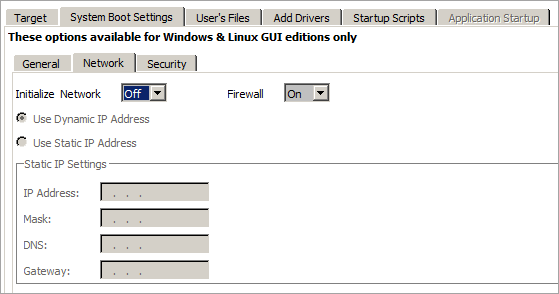
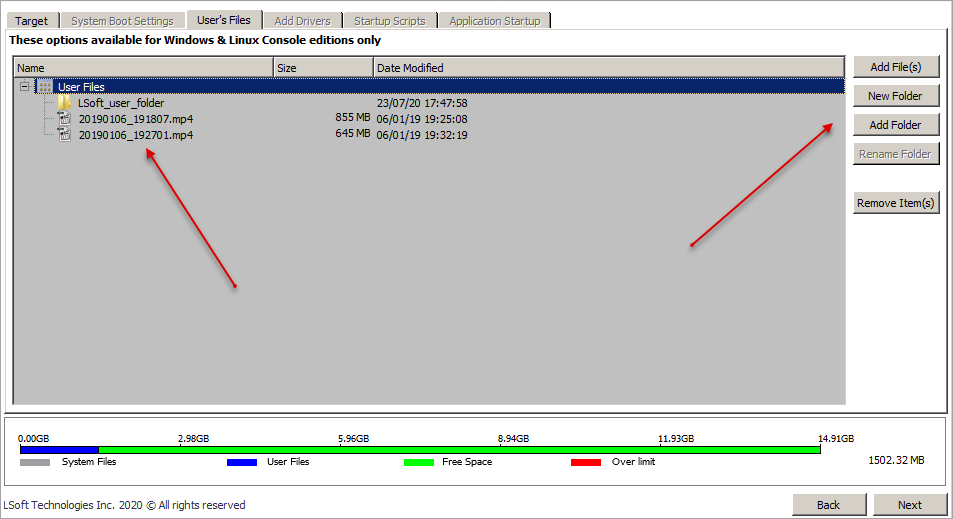
- To add your custom files to bootable media, click User’s Files tab. Add files or folders using
related buttons at the right side. Added items will be placed to User_Files root folder.
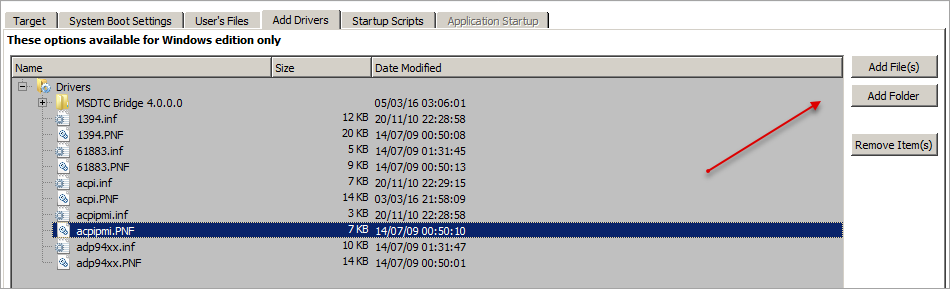
- To add specific drivers to be loaded automatically, click Add Drivers tab. Add all files for the
particular driver (*.inf, *.sys, …). Added items will be placed into BootDisk_Drivers root folder. At
boot time all *.inf files located in this folder will be installed. Read here for more details.
- To add specific scripts to be launched after Active@ Boot Disk is loaded, click Startup
Scripts tab, add your scripts (*.cmd files). Added files will be placed in BootDisk_Scripts
root folder. At boot time all *.cmd files located in this folder will be executed. Read here for more details.

- To add startup command line or ini-syntax parameters use Application Startup tab.
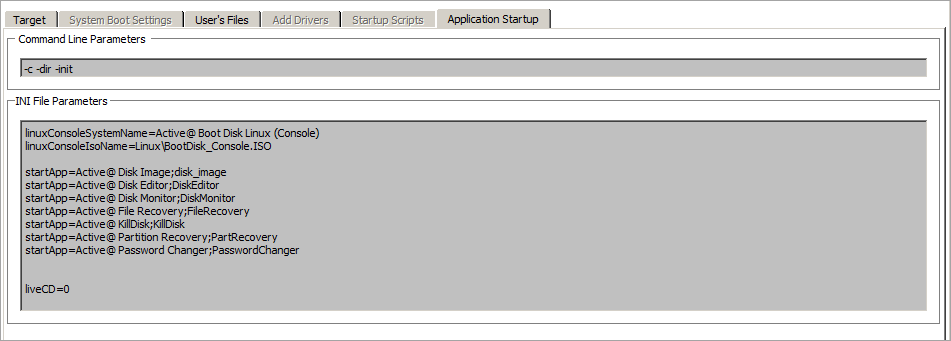 Note: Available for Linux-based profiles
- To specify additional boot options click System Boot Settings tab. You can change default settings
to be used: Time Zone, Additional Language and Keyboard support,
Display Resolution, Default Application => Start and Time to
Autostart => Seconds:
-
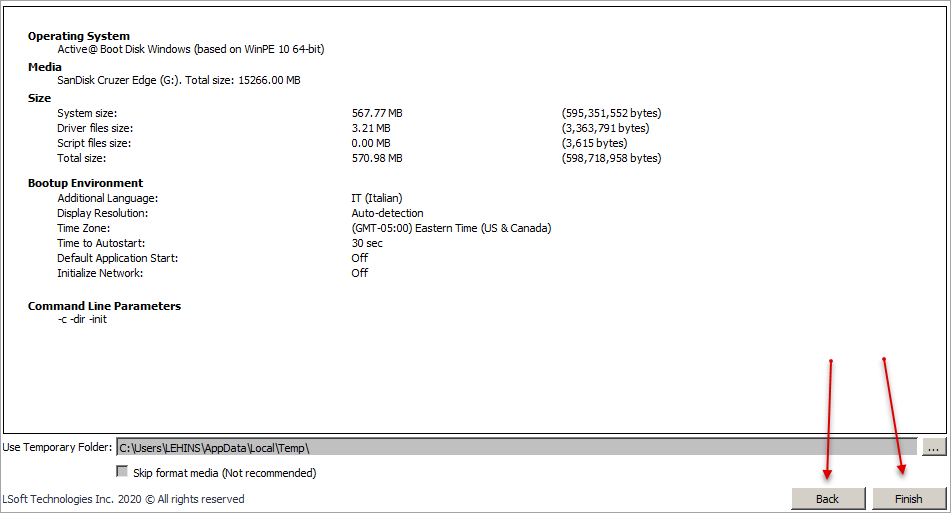
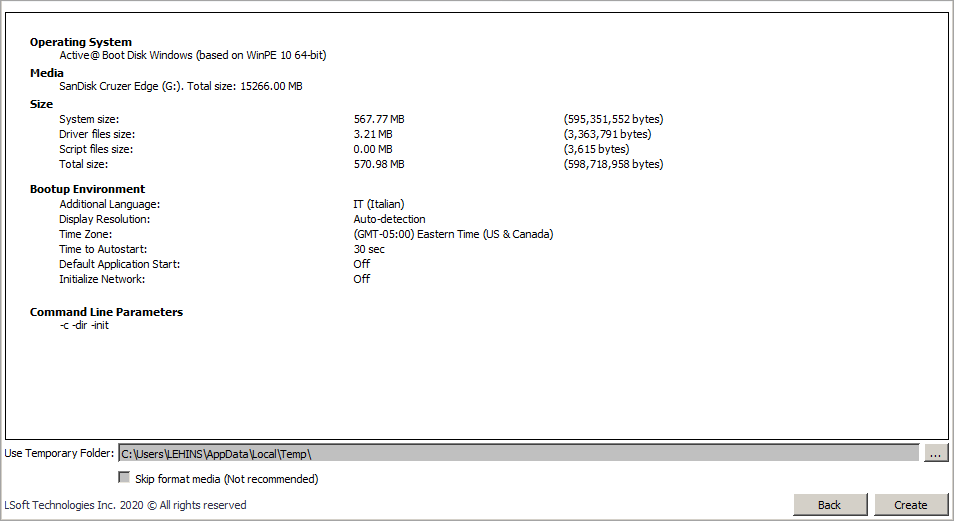
When you have completed all the necessary steps, click Next. Verify the selected Operating System,
selected Media, Sizes, Bootup Environment and Command Line Parameters (if applied). Temporary
folder may be specified as well.
-
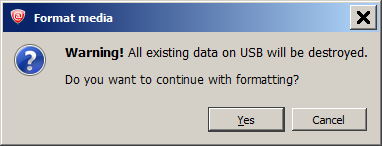
Click Create and confirm the procedure:
-
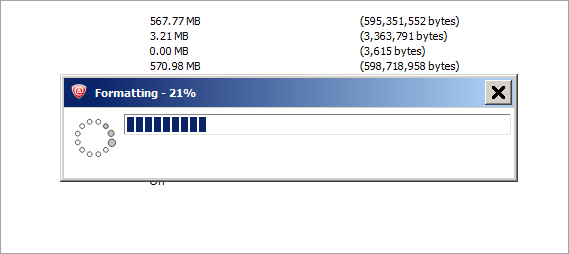
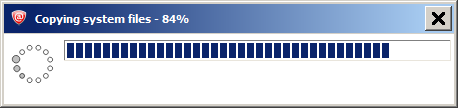
Observe the process of initializing and creating your new Active@ Boot Disk on selected media!
-
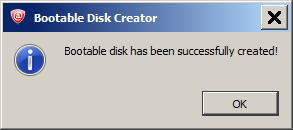
When the procedure of creating is done successfully the confirmation dialog appears. Click OK and
Finish on main window if you want to close the Active@ Boot Disk Creator or click
Back to continue working (creating more disks/USB or ISO images):