This means that you can recover deleted or damaged partitions located on data volumes (D:, E: and so on), attached hard drives, as well as
on the external USB drives and Memory Cards (SunDisk, MemoryStick, CompactFlash, etc.). On a system partition, boot.ini is
corrected automatically (if needed) to repair an un-bootable system. As well, damaged Volume Boot Sectors are corrected to maintain
integrity of the partition. This utility also enables you to fix a damaged MBR and to delete invalid partitions.
For any computer to boot properly, the following conditions must apply:
The MBR (Master Boot Record) exists and it is not damaged in any way
The Partition Table exists and contains at least one active partition
If these conditions exist, the executable code in the MBR selects an active partition and passes control to it so that it can start loading
the system files (COMMAND.COM, NTLDR, BOOTMGR,... ).
If these files are missing or are corrupted then the operating system will not boot.
Data Recovery Tips
CAUTION: DO NOT WRITE ANYTHING ON THE DRIVE THAT CONTAINS YOUR IMPORTANT DELETED DATA!
When you install software, you write data on the disk. This can destroy your deleted data. If you have only one logical drive, physically
remove the hard drive from the computer and install it as a second logical drive on another computer where data recovery may be
possible.
CAUTION: DO NOT SAVE RECOVERED DATA ON THE SAME DRIVE THAT CONTAINS THE LOST OR DAMAGED DATA!
When saving recovered data, you are writing records to the file table. If you write these records to the same drive that contains the
damaged data, you are destroying the file table records that you are trying to recover. At the same time, you may be destroying the file
table records for other deleted entries. It is best to save recovered data onto another logical, removable or network drive.
Important: CREATE A RAW DISK IMAGE IF YOU HAVE AN EXTRA HARD DRIVE, OR OTHER LOGICAL DRIVES THAT ARE BIG ENOUGH!
A Raw Disk Image is a single file that stores all the data from your logical drive or physical device as a mirror image. Having
a Raw Disk Image can be useful when you want to back up the contents of the whole drive, and restore it or work with it later.
Before you start recovering deleted files, it may be a good idea to create a Raw Disk Image for the one drive, if you have
enough space on another drive. If you do something wrong while recovering the files (for example, recovering them onto the same drive
and destroying the data), you will be able to recover these deleted files and folders from the Raw Disk Image that you have
wisely created in advance.
Find and recover deleted partitions and logical drives
To find and recover deleted partitions and logical drives:
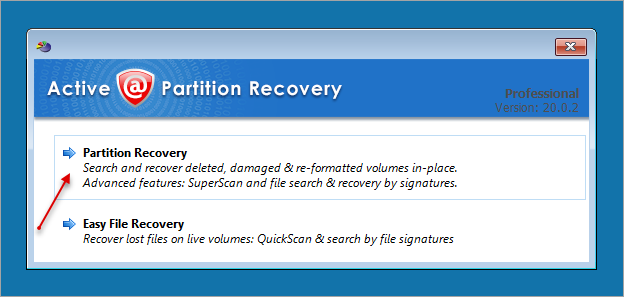
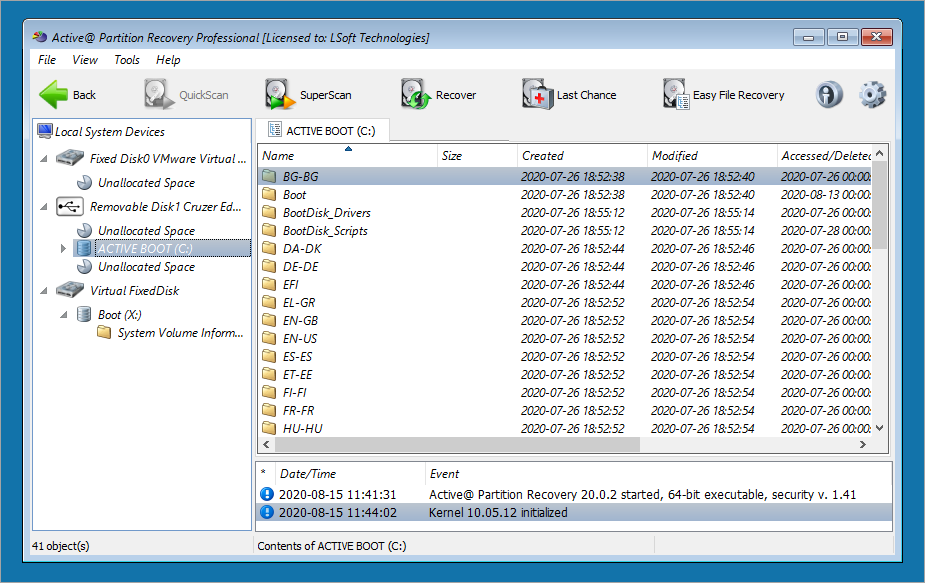
To open Active@ Partition Recovery in the Active@ Boot Disk shell click Start > Programs > Active@ Partition Recovery. After choosing a Partition Recovery submenu the Active@ Partition Recovery workspace
appears with all available devices listed in a tree view under Local System Devices:
To scan an unallocated space, select it. Known details of the selected item are displayed in the right pane.
To scan the unallocated space in basic mode, click QuickScan, the process will start and
the status bar will display the scan progress. After the scan is complete, a list of all allocated and unallocated
partitions will appear in the Local System Devices list.
If you cannot see a logical drive, you will need to process the whole surface of a disk, select it and right click on it
and click SuperScan:
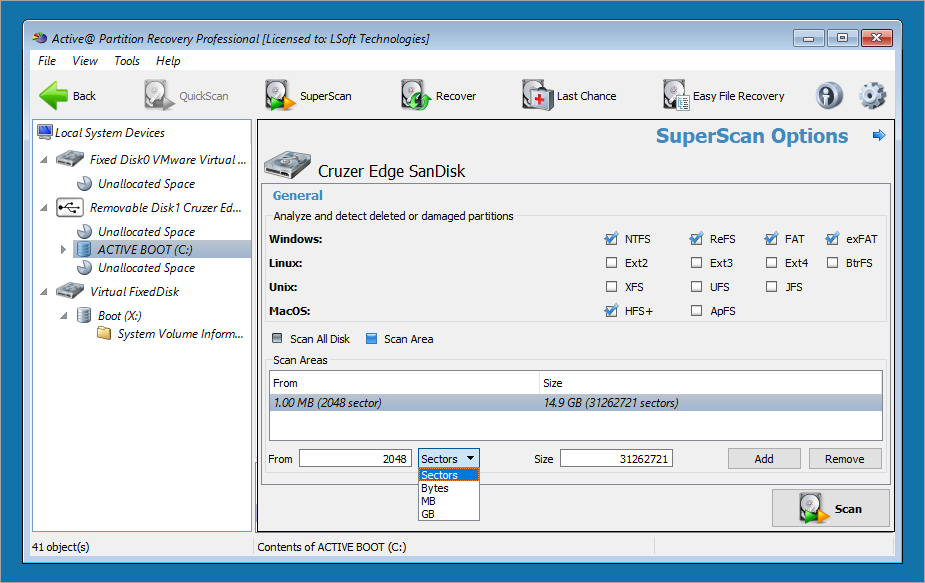
When the SuperScan Options dialog box appears do the following:
To restrict the scan to a small number of sectors, indicate the From sector and the number of sectors to
scan. If you are unsure about any of this, just ignore this step and click on Scan.
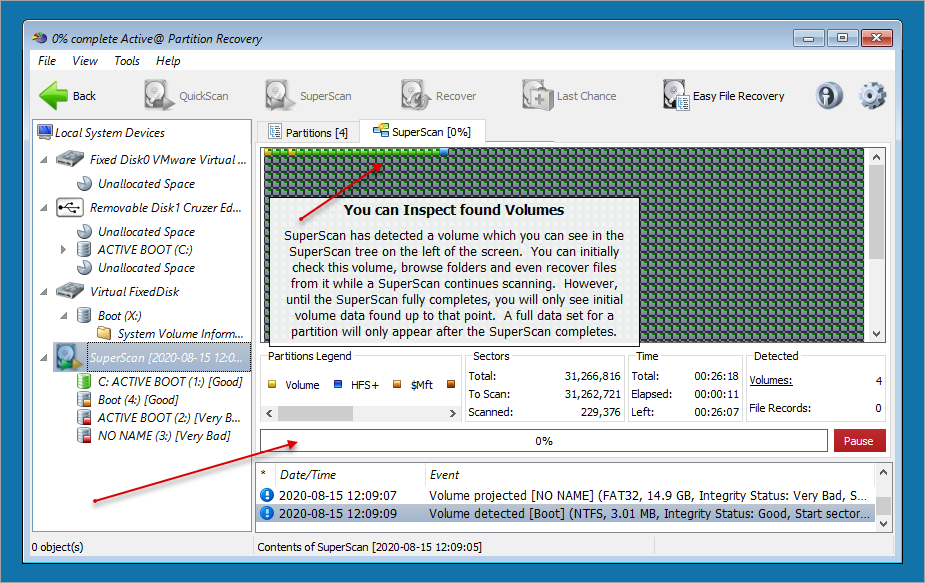
You can follow the scanning progress via status bar:
After the scan is complete, a new folder named SuperScan will be created in the Local System
Devices list.
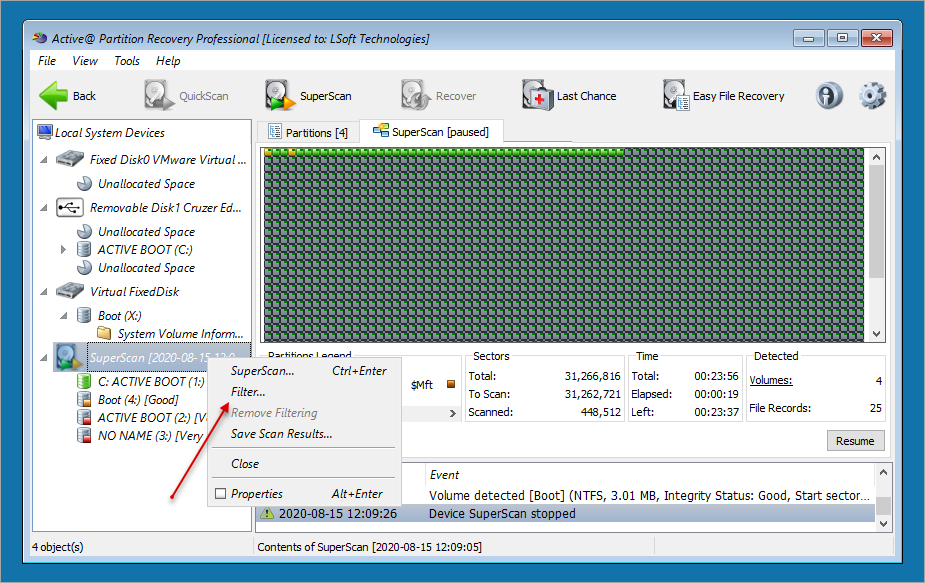
To display a smaller set of SuperScan results, do the following:
Right-click the SuperScan device node folder.
From the context menu choose Filter... This will open the Filter Found
Partitions dialog box.
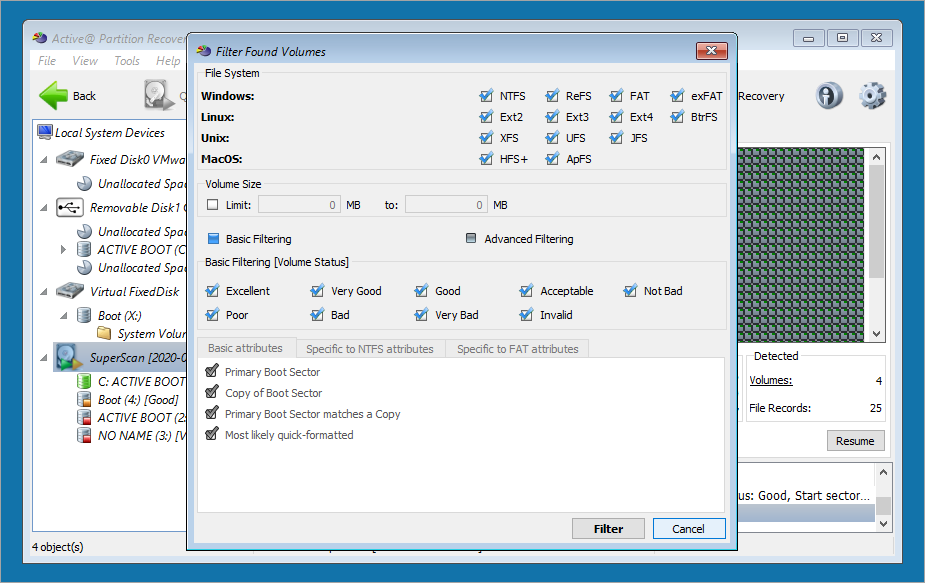
Scanning for all supported file types is on by default. If there are particular file types that you do not want to
be displayed clear the check boxes besides them.
To display only those partitions within a specified size limit, in the Partition Size area, indicate the
minimum and maximum size of partitions in Megabytes.
To use basic filtering parameters, in the Filter Type area, click Basic
Filtering.
To select displayed partitions based on partition status, in the Basic Filtering [Partition Status] area,
clear the check box next to each partition status number that you do not want to display.
To use advanced filtering parameters, in the Filter Type area, click Use Advanced Filtering.
To restrict displayed results for NTFS-specific parameters (in the Specific to NTFS
attributes area) select the check box beside all the types of data that you want to display
To restrict displayed results for FAT-specific parameters (in the Specific to FAT
attributes area) select the check box beside all the types of data that you want to display.
Click Filter. The right panel will display the filtered results.
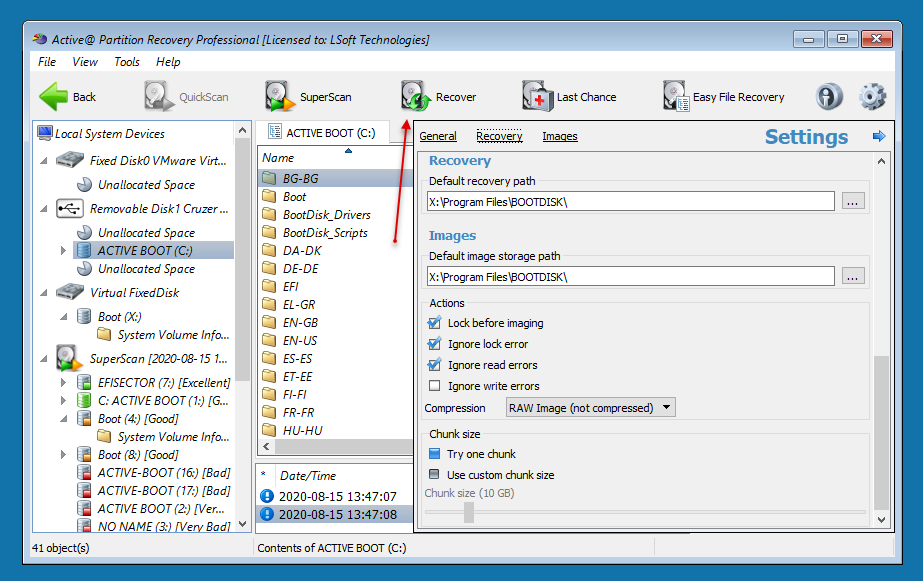
In order to recover your partition you will need to click on the SuperScan folder in Local System
Devices. This will show the SuperScan results in the right pane
If you didn’t do anything with the unallocated space after you deleted the partition, chances are pretty
good of recovering it
To ensure that the Windows operating system assigns the correct letter to the disk, select a disk
letter from the Assign Disk Letter drop-down list
To set the recovered partition as active and allow the system to boot from it, select the Set Partition
Active check box.
The recovery process checks the boot sector and fixes it if it is damaged. Select Automatic or
Manual, depending on how you want to do this.
If the disk has an extended partition, select the Create Extended Partition First check box and/or
use ALL Unallocated area check box. If these areas are not available, these check boxes will be
disabled.
To save a copy of the partitioning information before recovering, select the Backup Current
Partitioning Info check box and indicate the file name to store the backup
Click Recover
The partition is recovered.
You can manage other aspects of SuperScan results:
To save scan results, right-click on the SuperScan folder and choose Save Scan Results. You can also open the saved scan
results at any time.
To delete a SuperScan folder right-click on the folder and choose Delete.
To display detailed properties of a SuperScan folder right-click on the folder and choose Properties.
LastChance - if you were unlucky and you still didn’t manage to recover your partition there is still a chance to recover
at least part of it. This is where LastChance comes into play. By simply scanning the area of the deleted partition you can
find and recover lost files, that were presumed to be lost. In order to run LastChance do the following:
Click on the LastChance button in the top menu, this will open the LastChance wizard box
Choose the device where your previously deleted partition was being stored
Note: The purpose of LastChance Recovery is to enable you to scan and recover files based on their signatures or by their default
application. All of the supported files are checked by default, if you don’t require some particular file types uncheck them since
this will greatly speed-up the process.
Once you click on the Start the scanning will commence and can take to around a few hours. Depending on your drive size and the number of
file types you inputted, your mileage might vary. Once the scanning starts you can pause it but you can’t stop it.
Creating a Raw Disk Image
A Raw Disk Image is a mirror copy of your entire logical drive or physical device stored as set of files. It may be a good idea to
create a Raw Disk Image for a drive containing deleted files that you want to recover, if you have enough space on another
drive. If you do something wrong while attempting to recover a partition, you will be able to recover these deleted files and folders
from the Raw Disk Image of that partition.
Depending on the disk image creation settings, a Raw Disk Image consists of a configuration file (with an extension .DIM) and a
single file chunk, or set of files having extensions .000, .001, .002 ... (each file chunk has a size of 2 GB in this case).
Important: Do not save a Raw Disk Image back onto the disk that you are backing up. The target location to save the Raw Disk Image
must always be another drive.
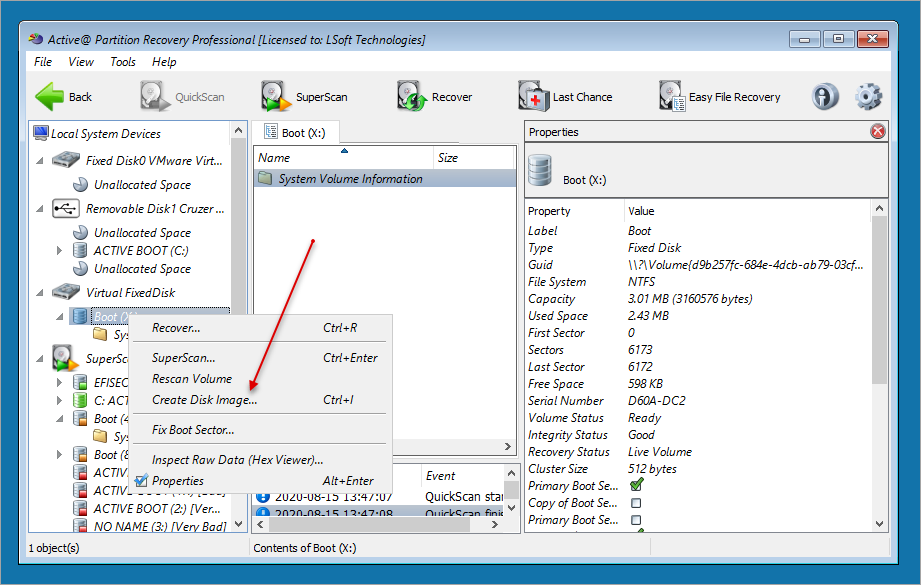
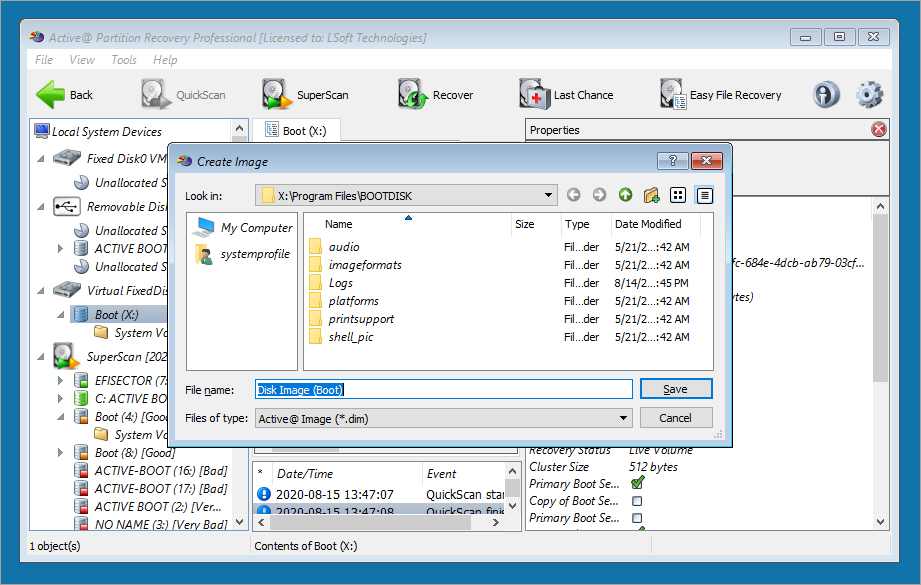
To create a Raw Disk Image:
In the Active@ Partition Recovery workspace, select a logical drive or a physical device. Right click on it and
choose Create Disk Image: Which will launch the dialog box.
Select another physical device or another logical drive.
Browse to the folder where you want to save the Disk Image.
In File Name field give the Disk Image file a descriptive name.
Click Save to start the process. The progress bar will appear.
Watch the progress and wait while drive's contents are copied to the new location. You can cancel the process of image creation anytime by
clicking Stop.
Fixing or creating the MBR
The MBR (Master Boot Record) is created when you generate the first partition on a
hard disk. It is probably the most important data structure on the disk. The MBR contains the partition table for the disk and
a small amount of executable code. On x86-based computers, the executable code examines the Partition Table, and identifies the
system partition. The MBR then finds the system partition's starting location on the disk, and loads the copy of its
Partition Boot Sector into the RAM. The MBR then transfers execution to executable code in the Partition Boot
Sector.
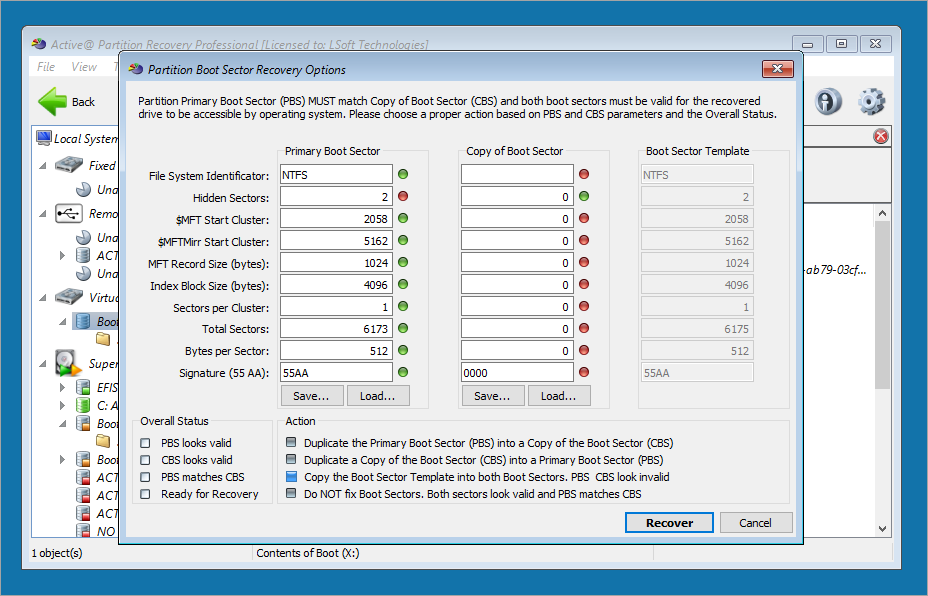
To fix or create a typical MBR:
In the Active@ Partition Recovery workspace (in the Local System Devices list) select a disk.
From the Tools menu choose Fix Boot Sector
Partition Boot Sector Recovery Options window is the next step in fixing your Boot Sector. Primary Boot Sector column (PBS) on
the left must have same values as the Copy of Boot Sector (CBS) on the right
The MBR is fixed.
Note: For more detailed instructions and support, see the Active@ Partition Recovery User Guide at Start > Documentation.