Active@ KillDisk
Active@ KillDisk is a powerful utility that will:
- Wipe confidential data from an unused space on your hard drive
- Erase data from partitions or from an entire hard disk
- Destroy data permanently
Wiping the logical drive's deleted data does not delete existing files and folders. It processes all unoccupied drive space so that recovery of the previously deleted files becomes impossible. Installed applications and existing data are not touched by this process. Active@ KillDisk wipes unused data residue from file slack space, unused sectors, and unused space in MFT records or system records.
When you erase data with Active@ KillDisk, you destroy data permanently, conforming to more then 20 International Standards or your own custom settings.
Wiping drive space or erasing data can take a long time, so perform these operations when you are prepared to wait. For example, these operations may be run overnight.
Using Active@ KillDisk
To run Active@ KillDisk:
- From the Active@ Boot Disk shell click . After initializing, the Active@ KillDisk
workspace appears with all available devices listed:
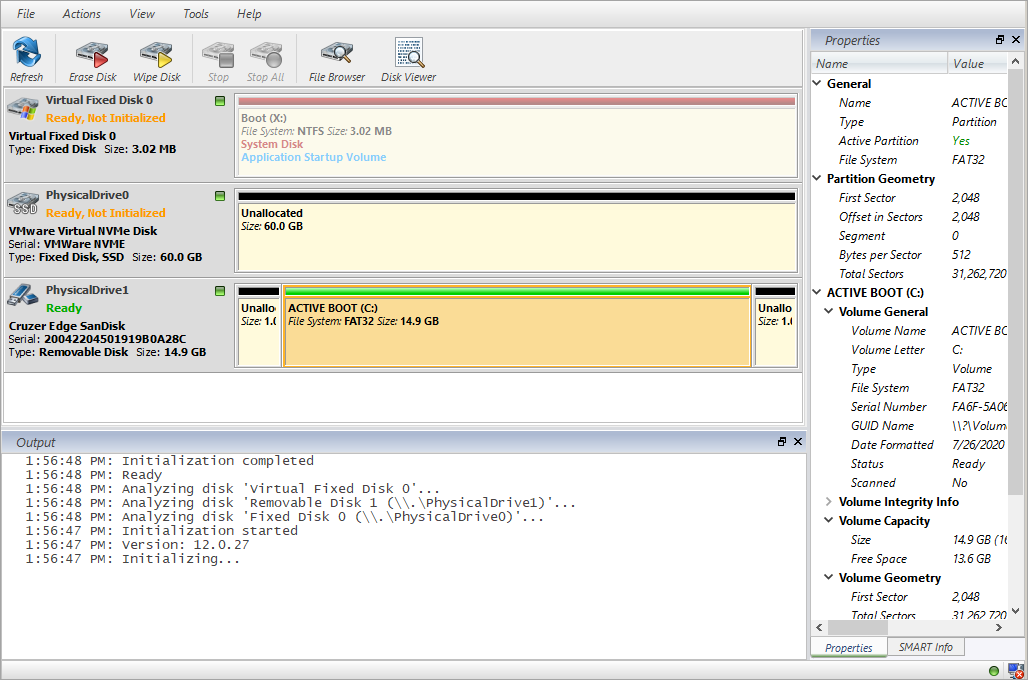
- Click a physical drive or a logical drive to select it. Properties of the selected device will appear in the Properties tab docked to the right side.
- To inspect the logical drive, select it and click File Browser toolbar button. The Progress tab will appear, showing the status of the scan while Time Left counts down the remaining time.
- When the scan completes, sub-folders will appear in the System Local Disks list and the folders and files in the selected drive appear in the Folders and Files tab.
- Available files and folders will appear with a colored icon, while deleted files and folders will appear with a gray icon.
- After the scan has been completed, you can:
- Inspect existing and deleted folders and files in the Folders and Files tab.
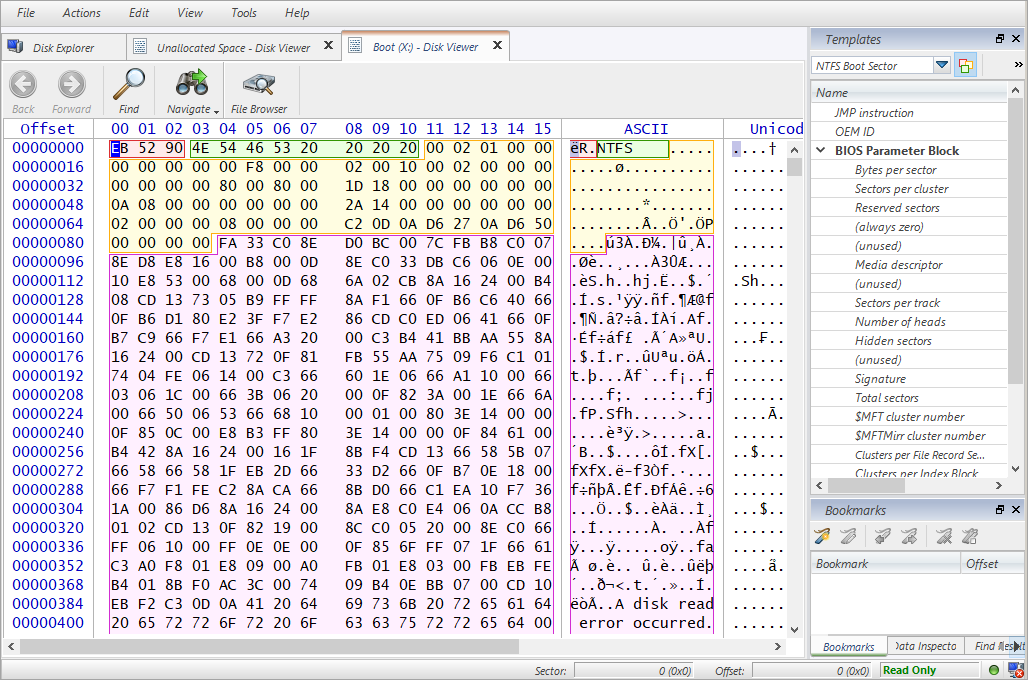
- View sectors of data in a device or logical drive select a device or drive and click Disk
Viewer toolbar button. The Disk Viewer appears. Scroll through the
available data:
-
View sectors of data in a file:
- Select a logical drive. Files and folders appear in the right panel.
- In the right panel select a file.
- Click Hex Preview. The Data Viewer appears. Scroll through the available data.
Wiping Data
- To clear data residue from unused sectors:
- Select the check box next to a device or logical drive or multiple devices or logical drives.
- Click Wipe Disk toolbar button. The Wipe Disk dialog box appears:
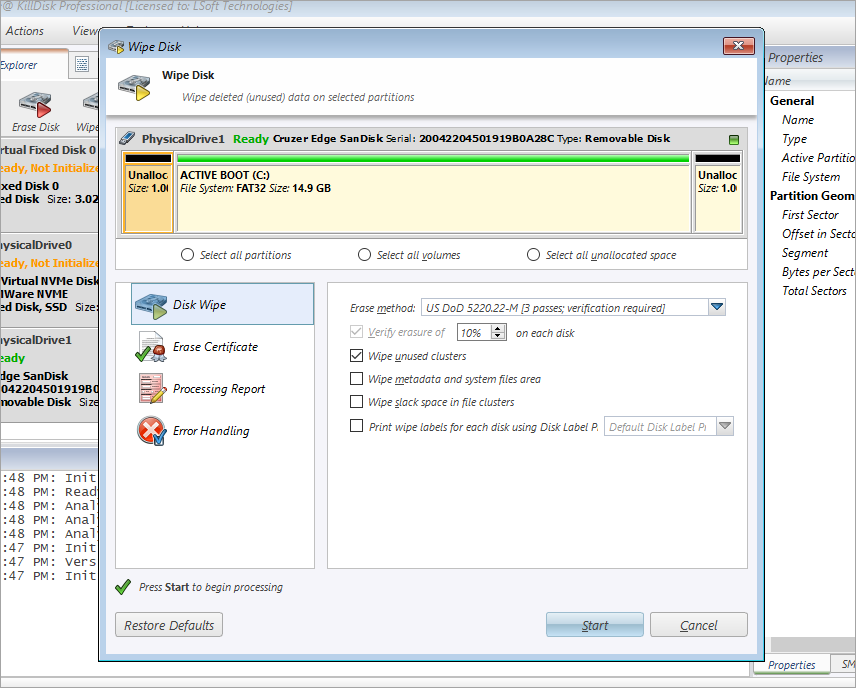
- Choose one of the methods from the Erase method list.
- To change other parameters, like Certificate options click other tabs at the left side.
- Click Start
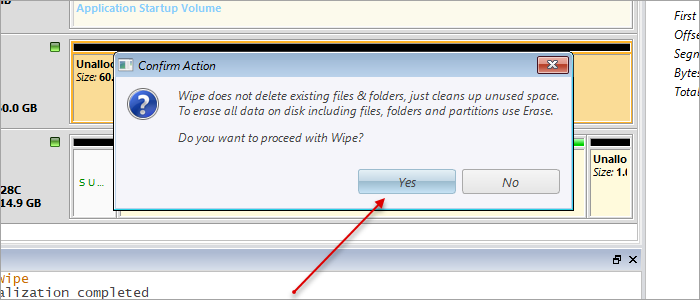
- The Confirm Action dialog box appears. Click Yes
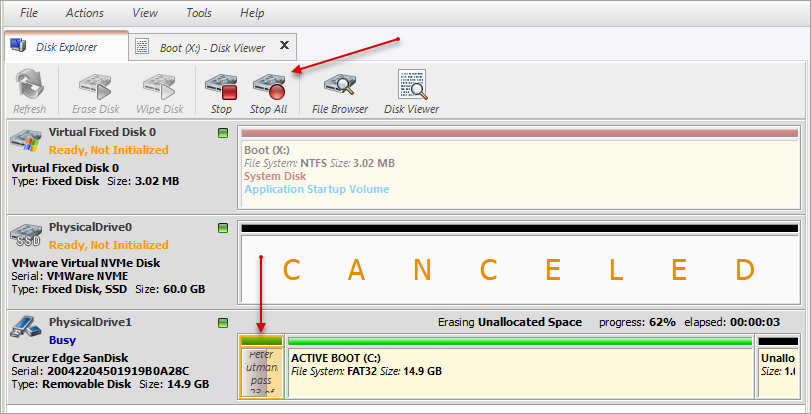
- The process will be initialized with the progress bar:
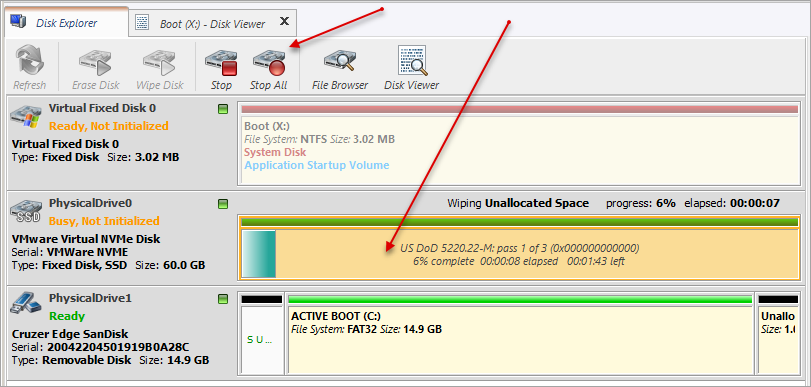
- To stop the process at any time, press ESC or click at the Stop All button near the progress bar. You can also stop the drive wipe by pressing the little red square near the progress bar at Local System Devices.
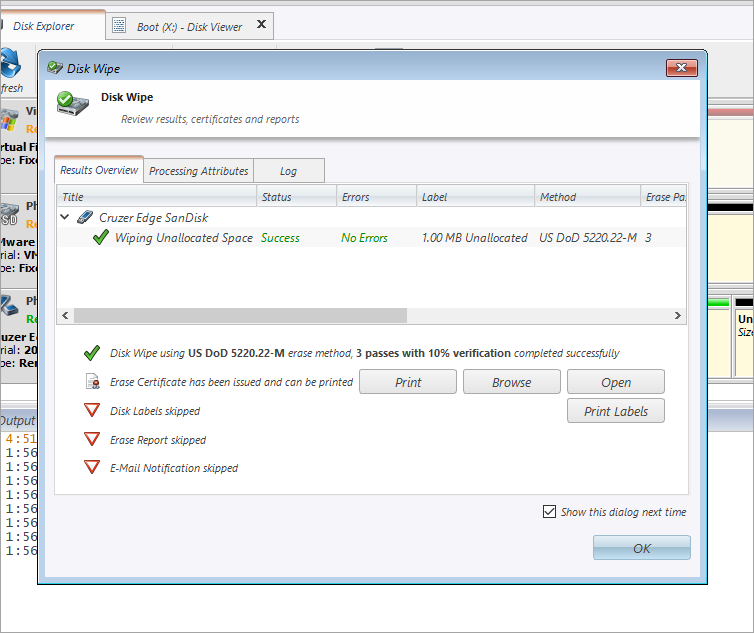
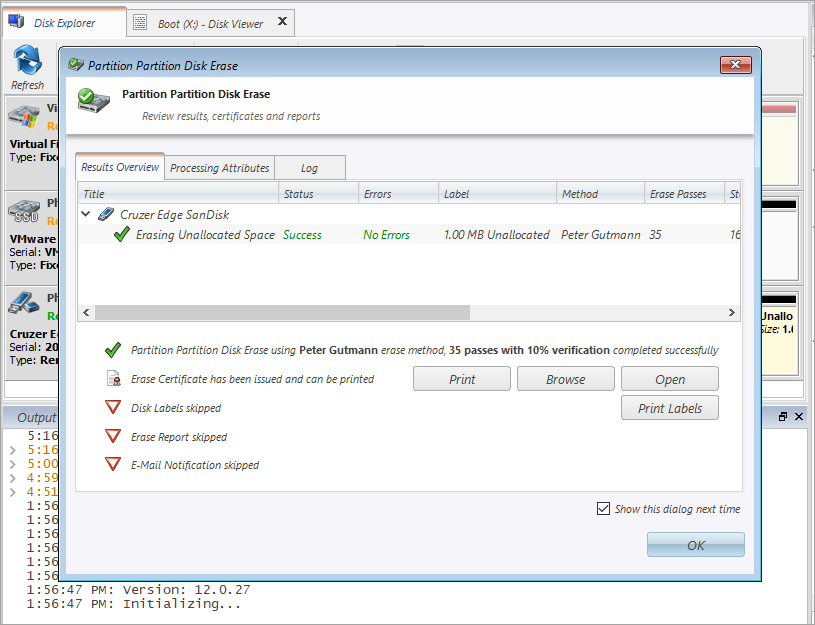
- After successful process of wiping the dialog screen looks like the following:
Erasing Data
To erase data completely:
- Select the check box next to a device or logical drive or multiple devices or multiple logical drives.
- Click Erase Disk. The Erase Disk dialog box appears:
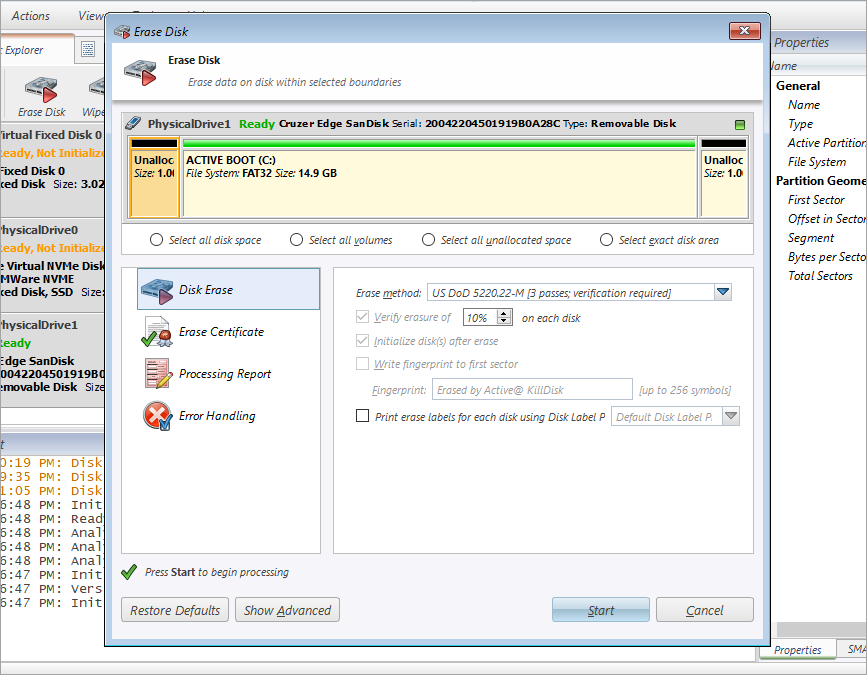
- Choose a method from the Erase method list.
- If needed, set other erasing parameters by clicking on more options… in the bottom left corner.
- Click Start
- If the Skip Confirmation check box is clear, the Confirm Action dialog box will appear:
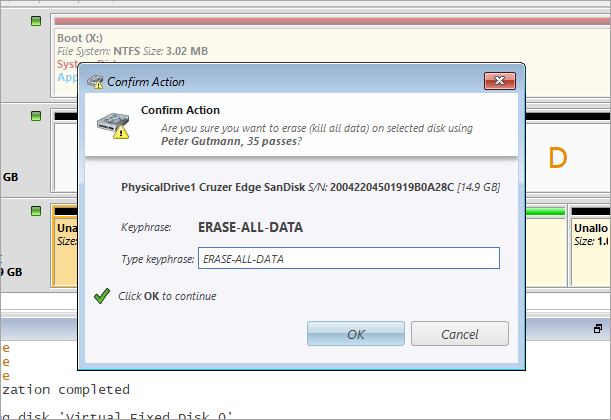
- This is the final step before removing data from the selected drive forever. Type ERASE-ALL-DATA in the text box and press ENTER or click OK.
- The process will start and the progress bar will appear:
- To stop the process at any time press ESC. You can also end the process by clicking on Stop All button or by clicking on the red square at the Load System devices panel near the progress bar of the drive that was being erased.
Erase/Wipe Options
- Verification
- In order to verify the wipe method, you will need to select the Verification check box and set the amount of area that the utility will read in order to verify the wipe method. Because verification is a long process, you can specify a percentage of the surface to be verified. To wipe or erase without verification, clear this check box.
- Wipe out Deleted/Unused data
- This parameter appears only when you are wiping data from unused space on the hard drive. The wiping
process clears data residue from unoccupied space on the hard drive and does not affect installed applications or existing data. This
process contains three options:
- Wipe unused clusters
- Wipe Metadata/System file area
- Wipe slack space in file clusters
You can choose to run only one or two of these options in order to make the process faster. If you want a thorough wiping of unused space, then include all of the options.
General Options
General parameters allow you to turn features on or off or change default settings before you erase or wipe data from an unoccupied space. You can also change the look and feel of the application and its logging options. To view and change settings, press the F2 key, or click the Preferences… from Tools menu.
- Initialize Disk(s) after Kill/Erase:
- Because of the BIOS restrictions of some manufacturers, a hard disk device that is larger than 300 MB must have an MBR (Master Boot Record) in sector zero. If you erase sector zero and fill it with zeros or random characters, you might find that you cannot use the hard drive after erasing the data. For this reason KillDisk is programmed to create an empty partition table and write a typical MBR in sector zero. This process is otherwise known as disk initialization
- Write Fingerprint to the first sector
- If fingerprint has been written to the disk’s first sector, next time you boot from this disk, you will see a disk erase status. If by any chance the errors have occurred or the erasing has been stopped, status will be FAILED and displayed in red color.
- Save Log and Shutdown PC after completion
- Erasing can take many hours. You can leave the KillDisk working and set it to turn the computer off when erasing is completed. A log file will be saved and can be reviewed later
- Skip Disk Erase Confirmation
- The confirmation screen is the final step before erasing data. In this screen, you type ERASE-ALL-DATA to confirm what is about to happen. If Skip Confirmation is turned on, this final safety request will not appear. This option is typically used with caution by advanced users in order to speed up the process. It is safer to run KillDisk when Skip Disk Erase Confirmation is selected by default. You may want to use this as a safety measure to ensure that data from the correct drive location is going to be erased completely with no possibility of future data recovery
- Ignore Disk Write Errors (bad sectors)
- If this option is turned on, error messages will not be displayed while data erasing or verification is in progress. All information about errors will be written to the KILLDISK.LOG file. These messages will be displayed in the final Erasing report after the process has been completed
- Stop Process after Writing Errors
- If by any chance writing errors appear during the wipe or deletion, you can adjust after how many errors would you like the KillDisk to terminate the process
- Retry Attempts
- To specify the number of retries to do when an error is encountered, enter the number in Retry Attempts
- Clear Log File before Start
- To truncate the session log before erasing or wiping starts, select the Clear Log File before Start check box. To append this session’s information to the existing session log, clear the Clear Log File before Start check box